Do-It-Yourself, Repairs and Fixes

2335 readers
1 users here now

Share tips and tricks to keep people from throwing out that broken item. Repair before replace!

founded 5 years ago
MODERATORS
1


prompted by this post in [email protected] I decided to ask you about my predicament.

I live in the attic of a rundown house that's close to 200 years old. looked like shit when I moved in, I've made it livable, I add and fix things here and there when I can, by youtubing stuff and using the tools I have.

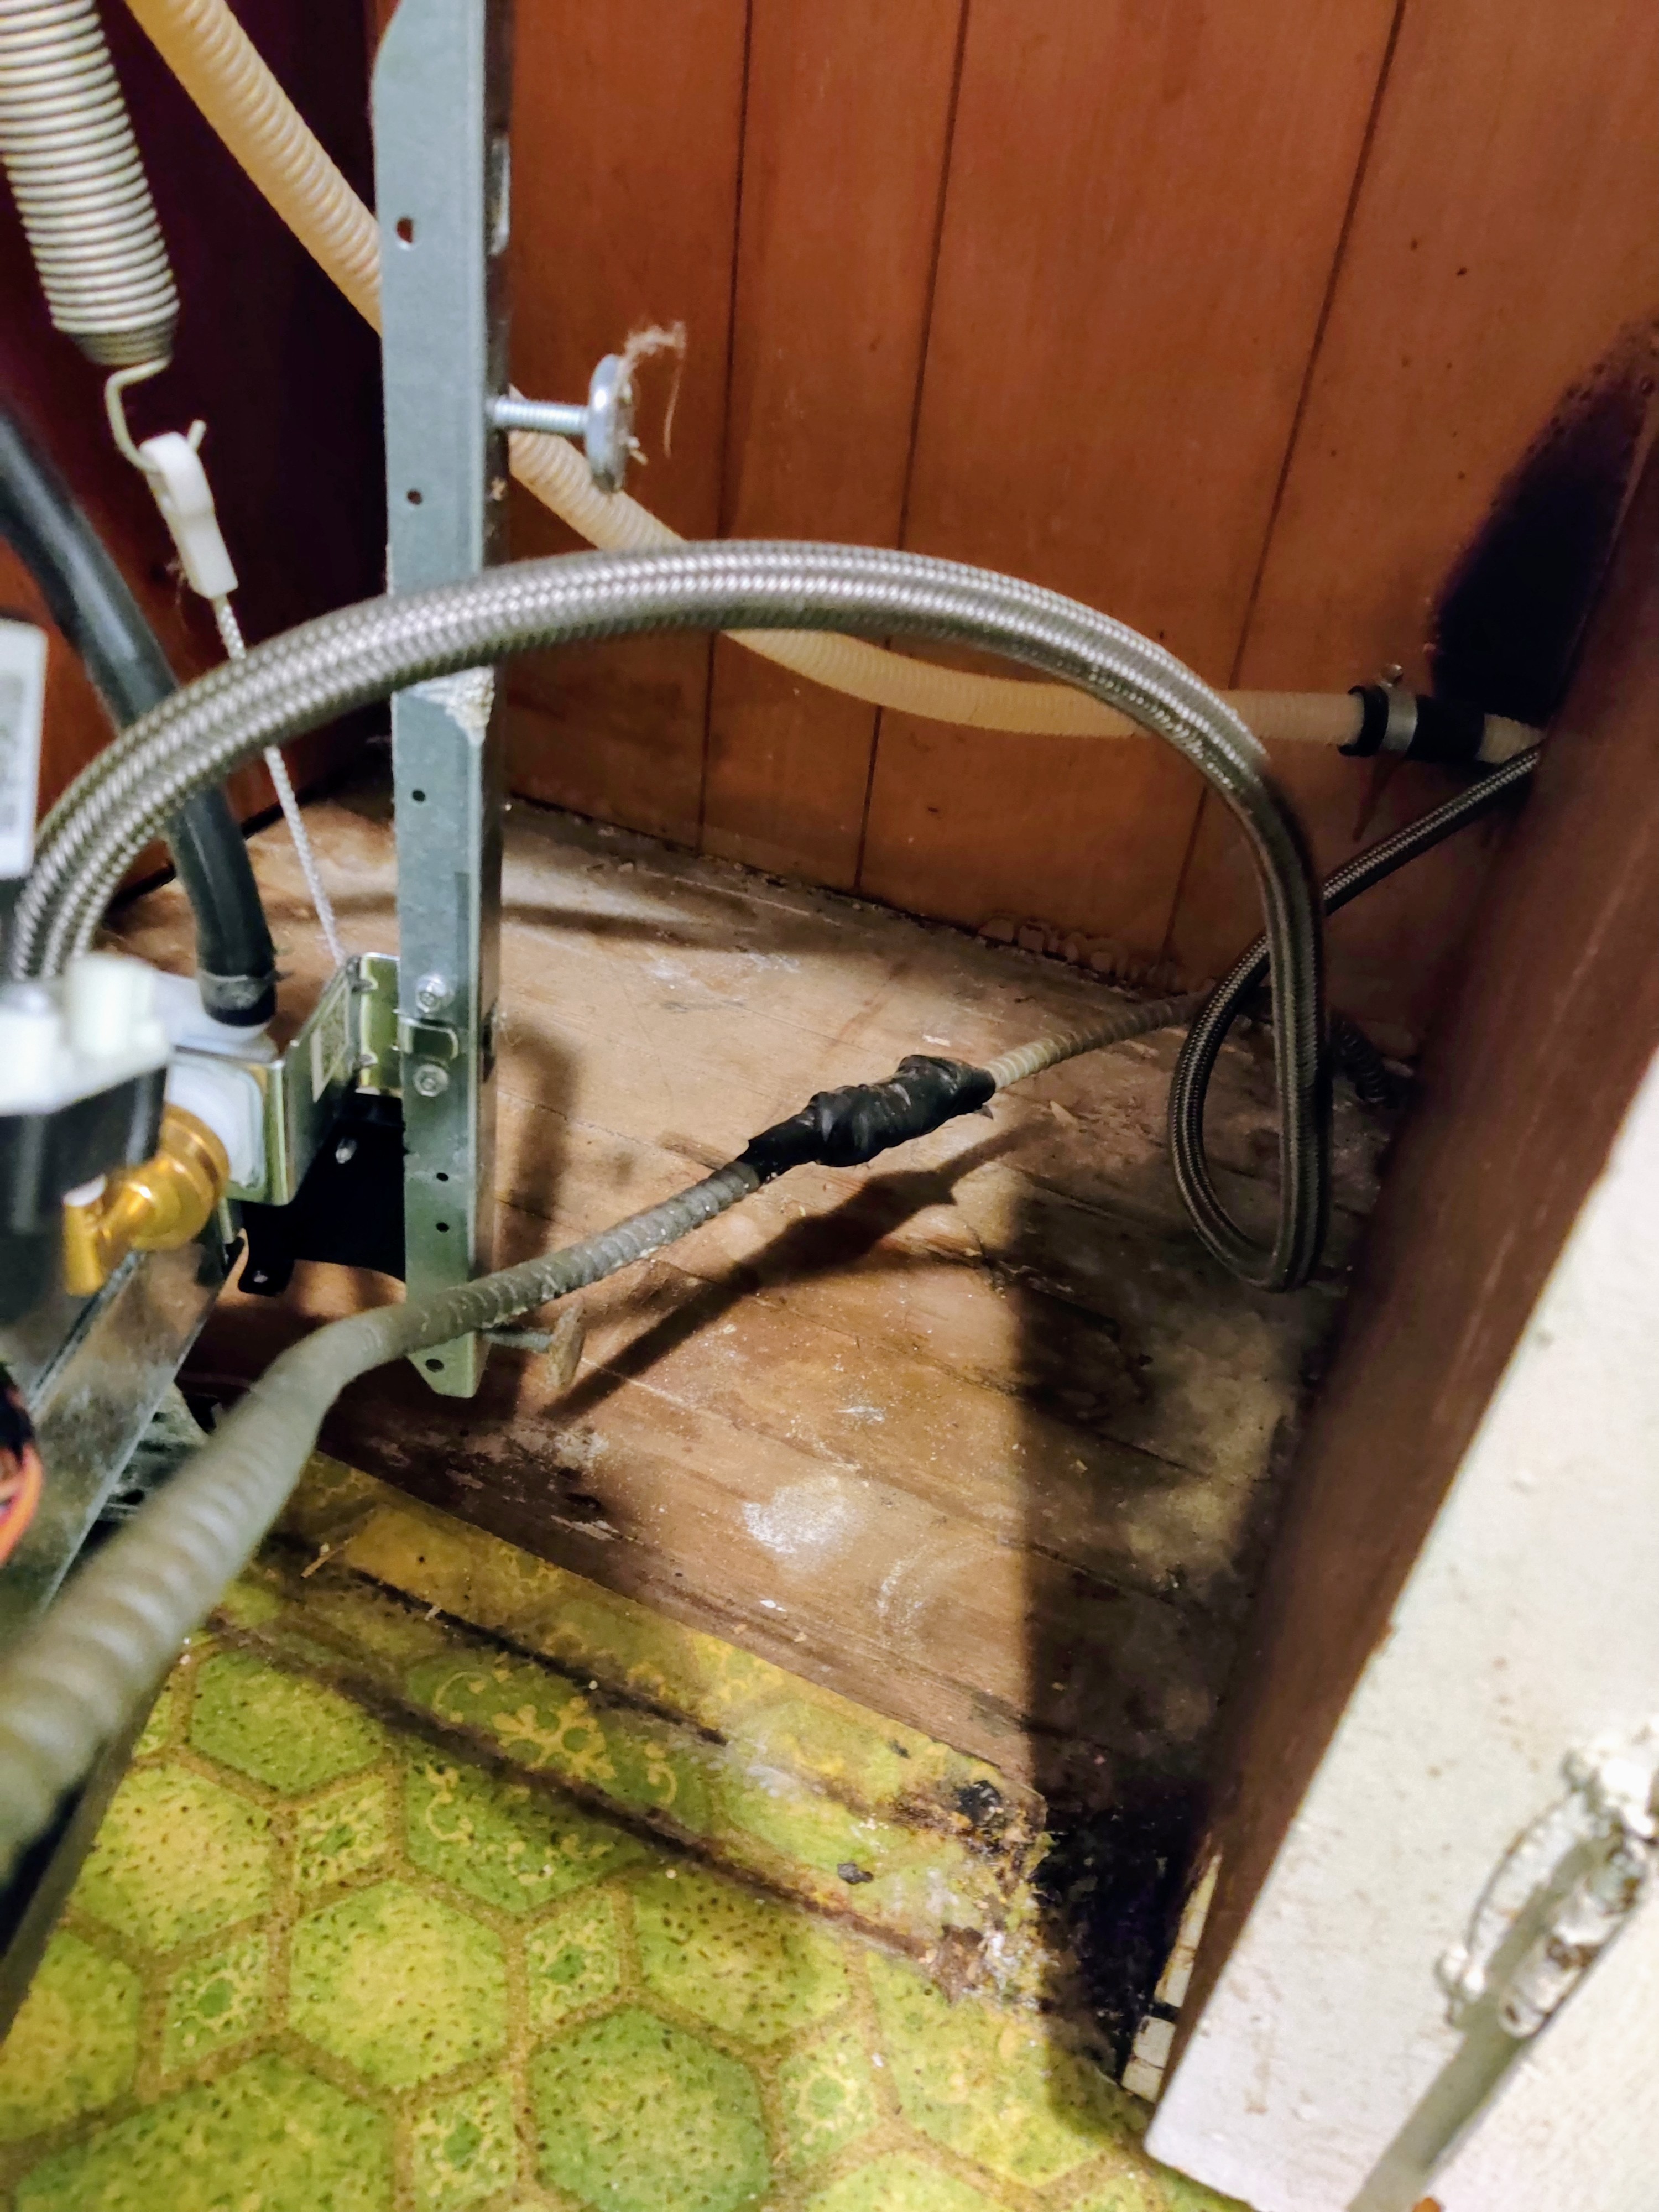
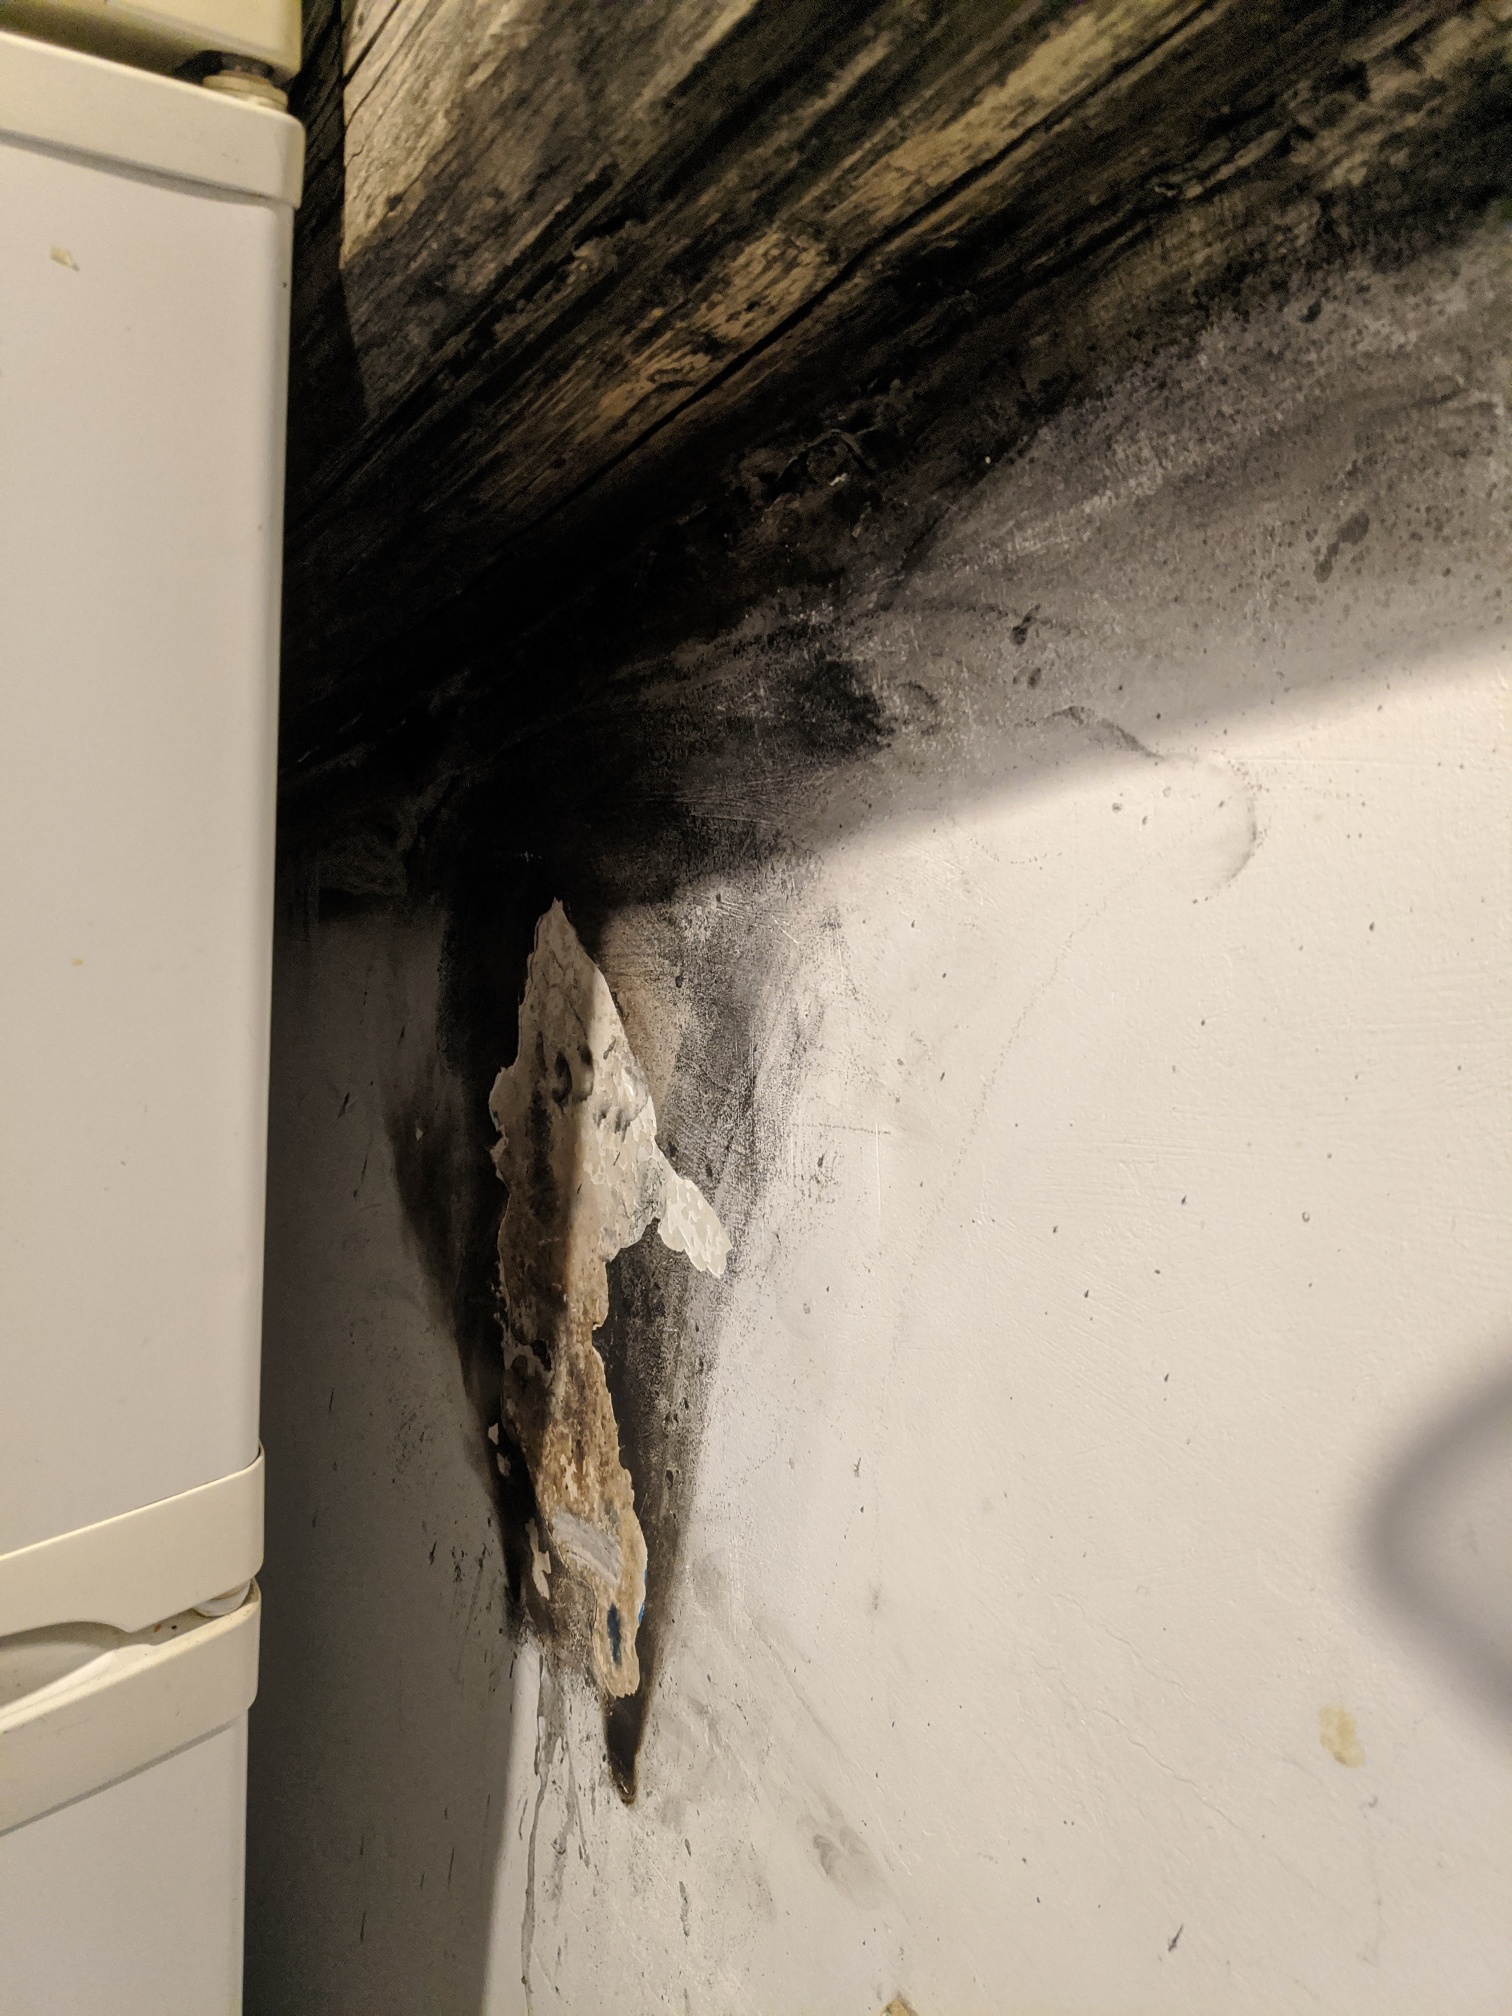
recently, a cheap electric kettle caught fire and burned for several minutes, incinerating nearby items and the (plastic) base it was on. the result was a black smoke so dark you couldn't see light from the windows, vantablack type of deal. once I dowsed out the flames (and surely inhaled that crap in major unhealthy doses) it took ages to air the place out.

in the aftermath, every surface was covered with greasy, black residue that you can't just wipe off/vacuum.

I've thrown away most things that were covered with it, cleaned others over the past months. only upside of this mess is, it sticks to the surfaces so it doesn't fall down and/or circulate in the air.

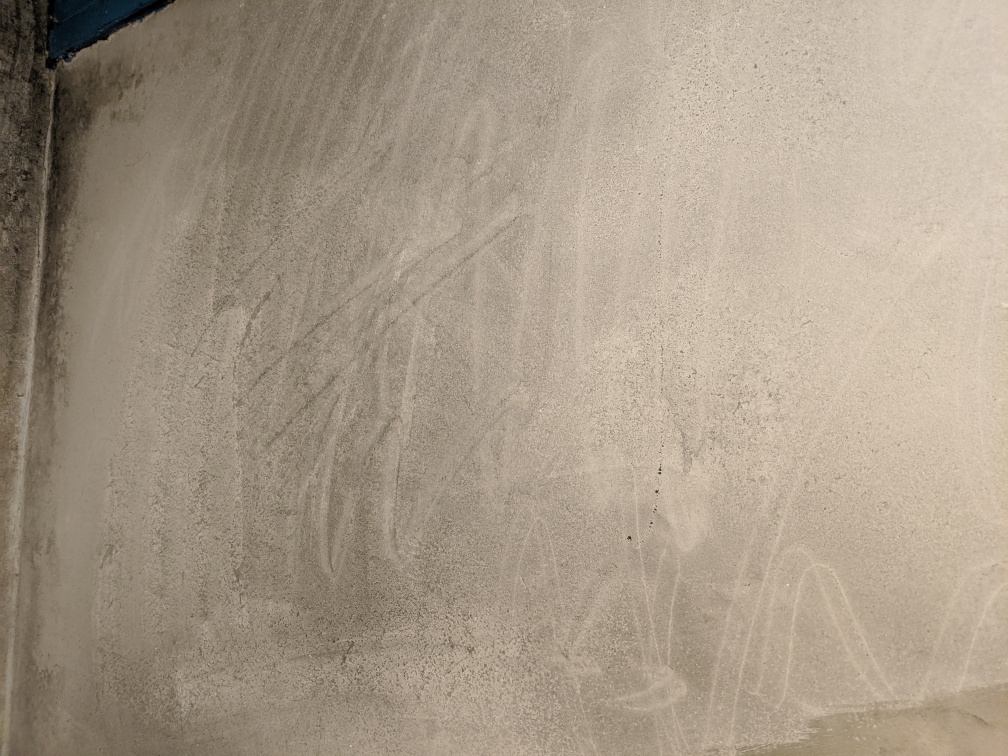
now I'd like to paint the walls. tried cleaning them with anti-grease and sponges and paper towels and stuff; that worked on kitchen cabinets, but it's a no-go here, just makes a mess and dissolves the stuff underneath (lime-based paint with god knows how many layers).

I figured, if I paint the walls and the exposed wood beam with the right type of paint, it'll just cover/trap the whole mess and I'd be done with it. then I'd like to clean/paint the ceiling paneling somehow.

can't afford to move into healthier dwellings and the owner has zero fucks to give about the situation and is fine with whatever I come up with, including leaving it as is; even with the fire damage, the place is in way better shape now than when I moved in.

doable? tips? ideas?

edit: images

edit2: I wish lemmy's UI would state the what the image limits are, it gets tiresome guessing how large is "too large".

2


The W and R keys don't work on my ASUS vivobook flip 14 and I would like to fix them so I can give the laptop to a friend. The reason they stopped working is because I spilled water on them a long time ago. Other than that, the laptop works perfectly fine.

I saw some teardown videos for an entire keyboard replacement for it, but it looks wayyyyyy too complicated and easy to mess up. I have expierence replacing stuff like batteries and SSDs in computers.

Is there a way to replace/fix those two keys without taking out the entire motherboard?

3


So I had a taillight bulb go out on me this week, and changing that bulb was simple enough, but also not particularly obvious. Had to look it up and could only find a overly long winded youtube video on it. In the interest of saving some one else the headache of scrubbing through a 20 min video to get answer that could have been explained in 2 minute short, I figured I would write it out.

Tools and Parts list

  • Flat head screwdriver
  • 8mm deepwell socket or wrench (A standard socket might work, but a baby socket won't. Long bolts.)
  • Replacement bulb
    • The red brake and taillight bulb is a white 7443 bulb. )
    • The turn signal bulb is an amber 7440A
    • The reverse light is a 921

Instructions:

1.) Open the trunk. (Yes, I'm a smart ass :-D )
2.) On the rear (driver's perspective) corner of the trunk on the side with the blown bulb, look for a removable plastic rivet. Place under the center part of the rivet, a flathead screwdriver and lever the center part up, then pull the rivet out. If you try to remove the rivet before poping the center part up you will break the rivet.
3.) Pull the carpet to the side to reveal where the back of the tail light assembly should be. You will find 2 long bolts secured with 8mm nuts.
4.) Remove the 8mm nuts.
5.) Applying rearward pressure to the exposed bolts and the outside of the assembly, remove the assembly. It slides off to the rear, not the side. This will take a bit for force, but not much. Be careful not to damage the tail light assembly or damage the wiring harness. The wiring harness has roughly 8 inches of play.
6.) You now have access to the bulb holders for the tail/brake light, turn signal, and reverse light. The bulb holders twist loose and it shouldn't take much force. The bulbs themselves are a friction fit into the bulb holders.
7.) Reverse these steps to reassemble.

4


cross-posted from: https://lemmy.crimedad.work/post/55668

cross-posted from: https://pixelfed.crimedad.work/p/crimedad/664462779759271734

If you use enough electrical tape, that counts as a junction box, right?

I'm a hack myself, so I get it, but jeez. A wet application like a dishwasher installation really isn't the place for this sort of carelessness.

The second picture shows how I remotely open a circuit breaker.

This post is a follow to my previous dishwasher install post (https://pixelfed.crimedad.work/p/crimedad/664264701761318465).

#diy #dishwasher #linoleum #electrical

@[email protected]

5


cross-posted from: https://pixelfed.crimedad.work/p/crimedad/641007525326911401

Finally fixed my refrigerator.

The previous owners of the house inexplicably cut the water line to the fridge, so I reconnected it only to find out that the ice maker would keep leaking water. That was happening because the solenoid valve that allows flow to the ice maker wasn't closing properly. Fortunately, it was an easy replacement, just a couple of screws and push connections.

#diy #RightToRepair

@[email protected]