I'm not sure if you know, you can craft and use two Conflux. The new Skimmer masteries have me interested as well!
mouse
joined 2 years ago
Looking at the changes lists many Wayland patches: https://github.com/GloriousEggroll/proton-ge-custom/tree/master/patches/wine-hotfixes/pending/wine-wayland
Searching through that list for "cursor" returned 3 results.
- https://github.com/GloriousEggroll/proton-ge-custom/blob/master/patches/wine-hotfixes/pending/wine-wayland/0014-winewayland-Implement-SetCursorPos-via-pointer-lock.patch
- https://github.com/GloriousEggroll/proton-ge-custom/blob/master/patches/wine-hotfixes/pending/wine-wayland/0017-winewayland-Treat-fully-transparent-cursors-as-hidde.patch
- https://github.com/GloriousEggroll/proton-ge-custom/blob/master/patches/wine-hotfixes/pending/wine-wayland/0030-cursor-shape-v1.patch
Here's the pull requests on the WINE HQ GitLab.
From the Nobara changelog: https://nobaraproject.org/category/changelog/
plasma-discover and gnome-software have both now been replaced with flatpost. Flatpost is a new in-house developed one-stop shop for flatpaks. It is able to handle installation, removal, upgrading, and permissions of flatpaks as well as flatpak repository management. You should find it provides all of the same permission toggles as flatseal. It is a simple application built on python and gtk, and is meant to be a desktop environment agnostic solution (meaning it should run in any DE). We did this because while we only support Gnome and KDE, we understand users still want to install their own environments and will do so regardless of whether or not it’s supported. If they are going to do that, again we prefer users to install flatpaks where possible for their software needs, and not all environments have a flatpak shop. For example if I’m using hyprland or labwc, now I have a shop I can use with them: https://github.com/GloriousEggroll/flatpost. Users can still manually install plasma-discover or gnome-software if they prefer.
Looks like someone asked Ethan about posting to Lemmy, and they replied "Thanks for sharing -- adding it to the list of places to post!".
Unfortunately that's one area I am bad with, I tend to use reverse_proxy for most such as Baikal running with the ckulka/baikal Docker image (which runs Nginx or Apache), otherwise I only static sites.
I'd start by looking at Baikal's config for Apache and Nginx, https://sabre.io/baikal/install/ and comparing to the directives for Caddy, https://caddyserver.com/docs/caddyfile/directives and
Since it uses PHP, it will need that, https://caddyserver.com/docs/caddyfile/patterns#php
Upon my searches I came across this, it talks about running Baikal with Caddy specifically. https://github.com/caddyserver/caddy/issues/497
I hope that this provided some helpful directions.
I use Caddy for this. I'll leave links to the documentation as well as a few examples.
Here's the documentation for wildcard certs. https://caddyserver.com/docs/automatic-https#wildcard-certificates
Here's how you add DNS providers to Caddy without Docker. https://caddy.community/t/how-to-use-dns-provider-modules-in-caddy-2/8148
Here's how you do it with Docker. https://github.com/docker-library/docs/tree/master/caddy#adding-custom-caddy-modules
Look for the DNS provider in this repository first. https://github.com/caddy-dns
Here's documentation about using environment variables. https://caddyserver.com/docs/caddyfile/concepts#environment-variables
Docker
A few examples of Dockerfiles. These will build Caddy with DNS support.
DuckDNS
FROM caddy:2-builder AS builder
RUN xcaddy build --with github.com/caddy-dns/duckdns

FROM caddy:2
COPY --from=builder /usr/bin/caddy /usr/bin/caddy
Cloudflare
FROM caddy:2-builder AS builder
RUN xcaddy build --with github.com/caddy-dns/cloudflare

FROM caddy:2
COPY --from=builder /usr/bin/caddy /usr/bin/caddy
Porkbun
FROM caddy:2-builder AS builder
RUN xcaddy build --with github.com/caddy-dns/porkbun

FROM caddy:2
COPY --from=builder /usr/bin/caddy /usr/bin/caddy
Configure DNS provider
This is what to add the the Caddyfile, I've used these in the examples that follow this section. You can look at the repository for the DNS provider to see how to configure it for example.
DuckDNS
https://github.com/caddy-dns/cloudflare?tab=readme-ov-file#caddyfile-examples
tls {
	dns duckdns {env.DUCKDNS_API_TOKEN}
}
CloudFlare
https://github.com/caddy-dns/cloudflare?tab=readme-ov-file#caddyfile-examples Dual-key
tls {
	dns cloudflare {
		zone_token {env.CF_ZONE_TOKEN}
		api_token {env.CF_API_TOKEN}
	}
}
Single-key
tls {
	dns cloudflare {env.CF_API_TOKEN}
}
PorkBun
https://github.com/caddy-dns/porkbun?tab=readme-ov-file#config-examples Global
{
        acme_dns porkbun {
                api_key {env.PORKBUN_API_KEY}
                api_secret_key {env.PORKBUN_API_SECRET_KEY}
        }
}
or per site
tls {
	dns porkbun {
			api_key {env.PORKBUN_API_KEY}
			api_secret_key {env.PORKBUN_API_SECRET_KEY}
	}
}
Caddyfile
And finally the Caddyfile examples.
DuckDNS
Here's how you do it with DuckDNS.
*.example.org {
        tls {
                dns duckdns {$DUCKDNS_TOKEN}
        }

        @hass host home-assistant.example.org
        handle @hass {
                reverse_proxy home-assistant:8123
        }
}
Also you can use environment variables like this.
*.{$DOMAIN} {
        tls {
                dns duckdns {$DUCKDNS_TOKEN}
        }

        @hass host home-assistant.{$DOMAIN}
        handle @hass {
                reverse_proxy home-assistant:8123
        }
}
CloudFlare
*.{$DOMAIN} {
        tls {
	        dns cloudflare {env.CF_API_TOKEN}
        }

        @hass host home-assistant.{$DOMAIN}
        handle @hass {
                reverse_proxy home-assistant:8123
        }
}
Porkbun
*.{$DOMAIN} {
        tls {
	        dns porkbun {
			api_key {env.PORKBUN_API_KEY}
			api_secret_key {env.PORKBUN_API_SECRET_KEY}
	        }
        }

        @hass host home-assistant.{$DOMAIN}
        handle @hass {
                reverse_proxy home-assistant:8123
        }
}
Retroid Pocket Official(@Retroid0fficial) posted

10:21 AM ET · Feb 13, 2025 · 67.1K Views
It can be used as a VPN router, any VM that needs a VPN can be connected to a network bridge that is forward through the VPN. This could also be done on the primary router and a VLAN.
Oops, looks like that's the wrong URL. I found it on Hacker News, here's the post https://news.ycombinator.com/item?id=42431065 https://hostyourgif.live/
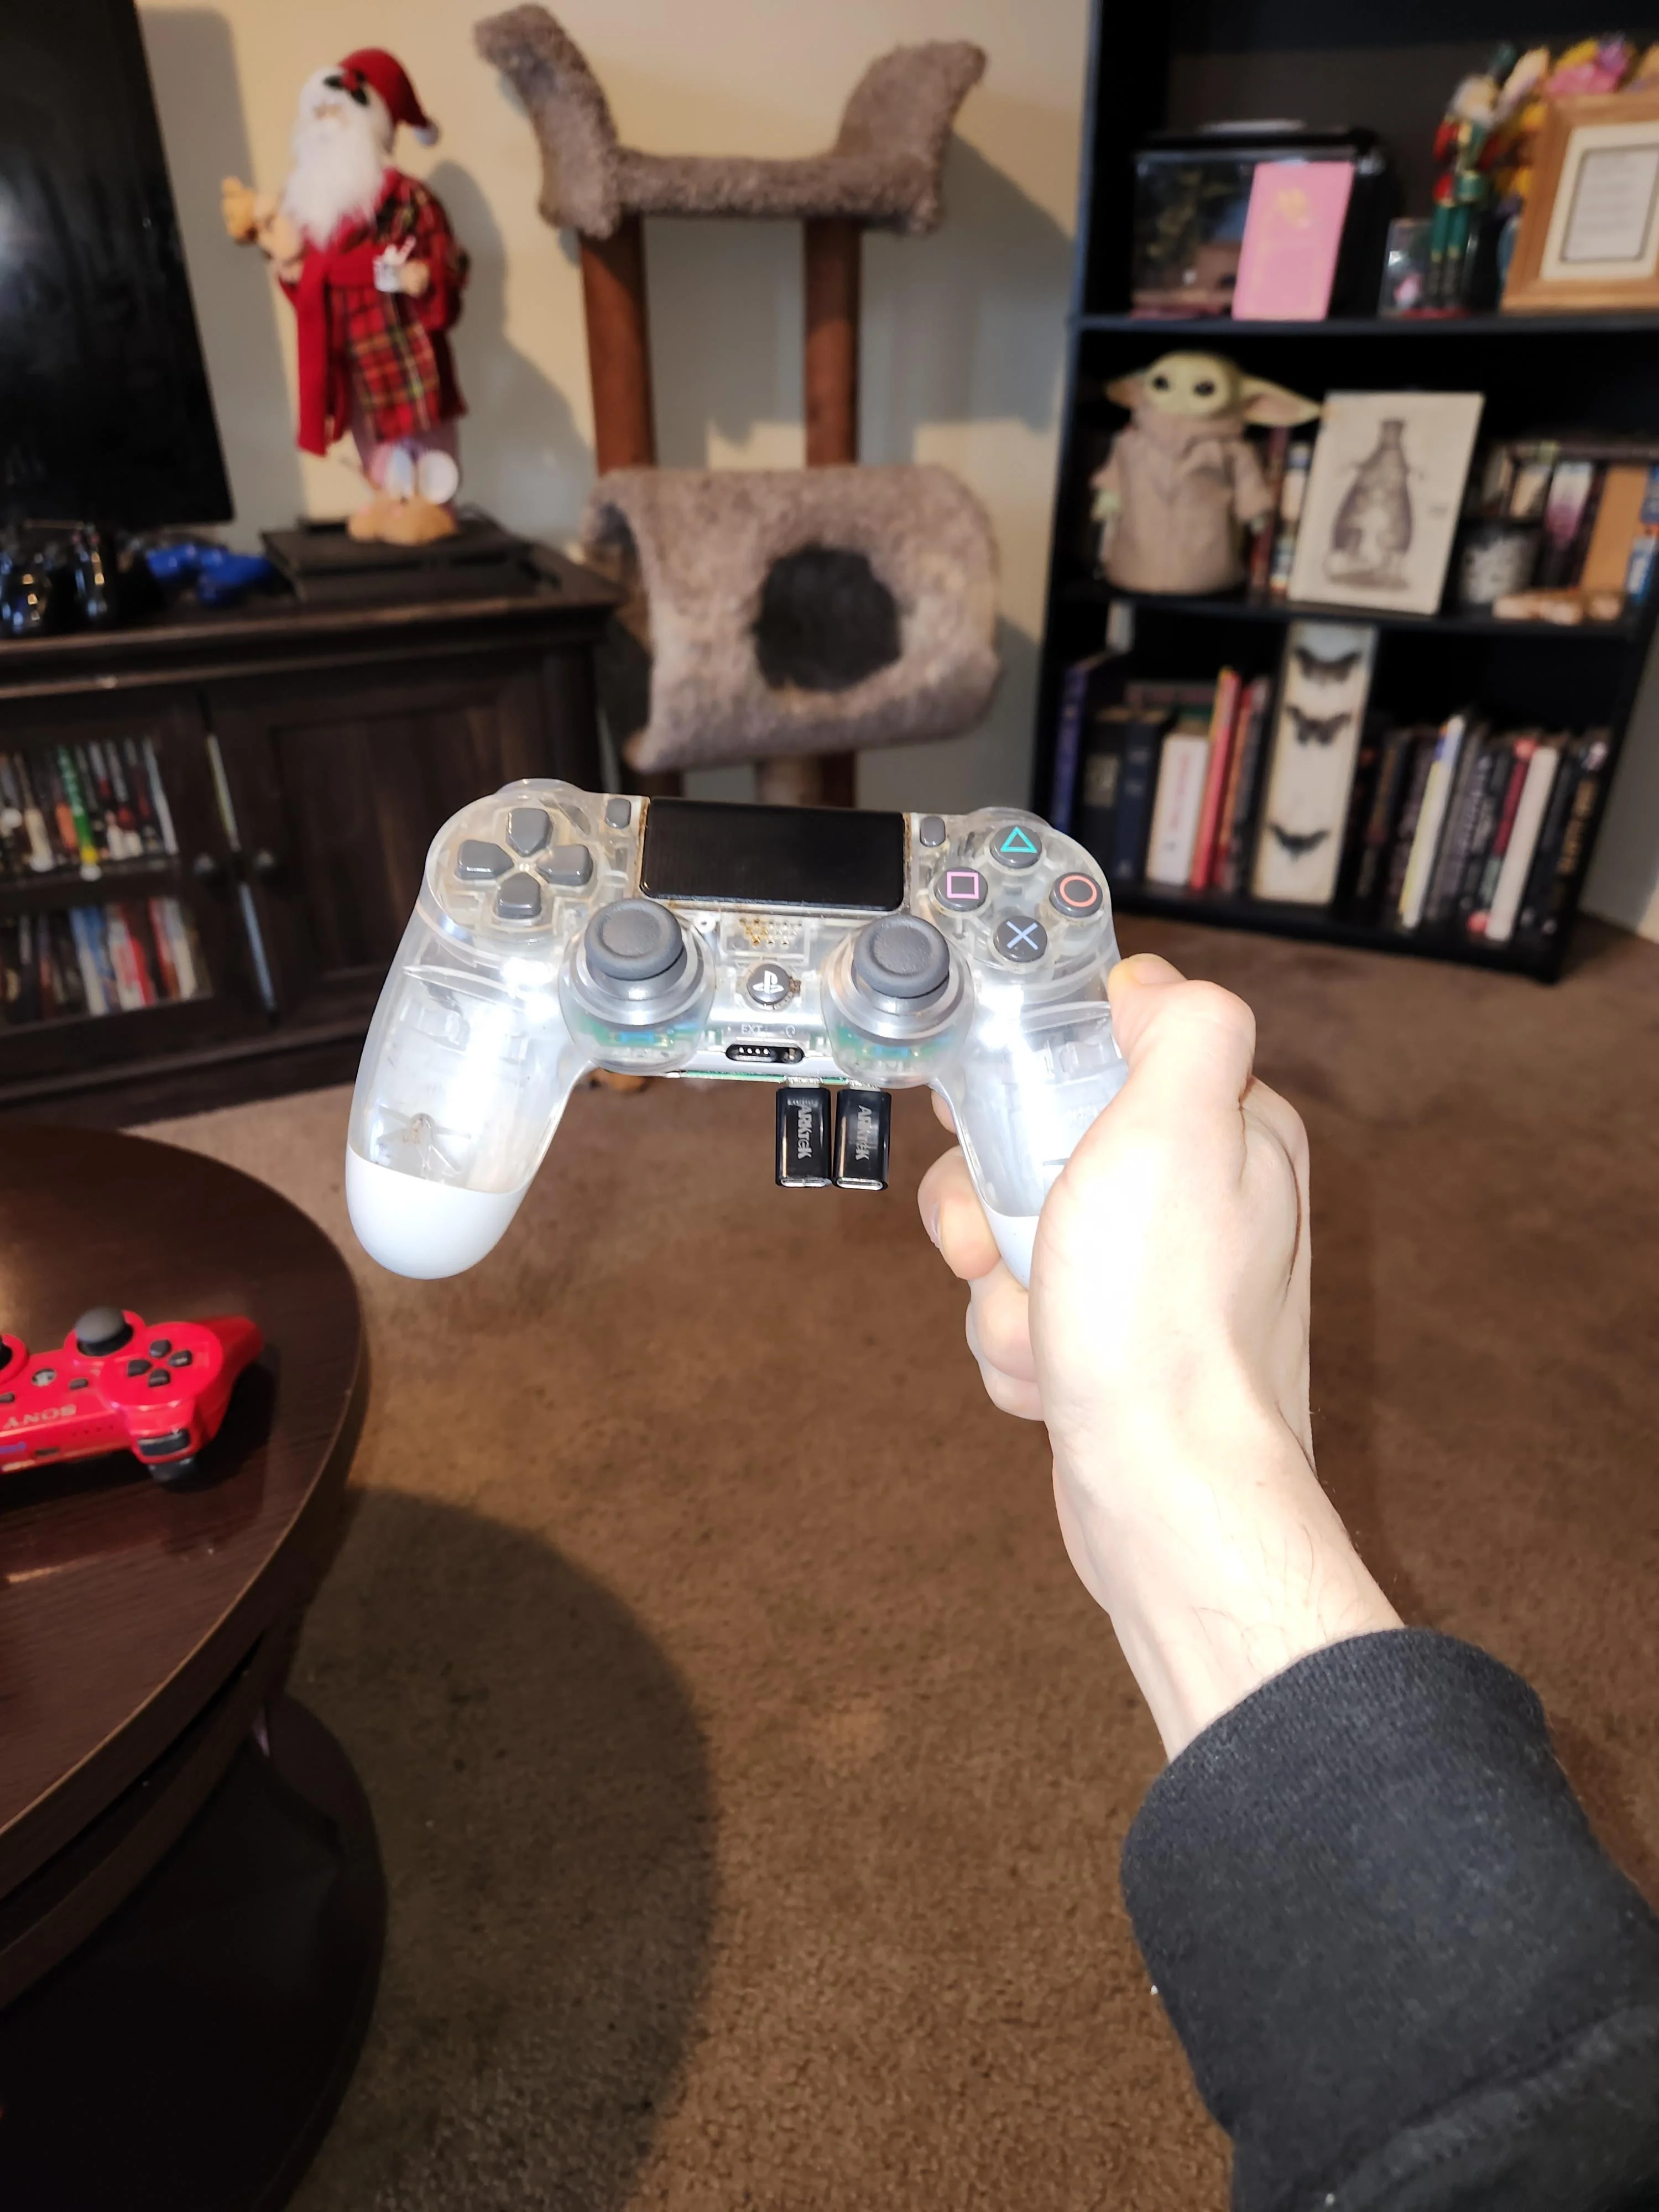
Copied the images as well as the comment containing information.
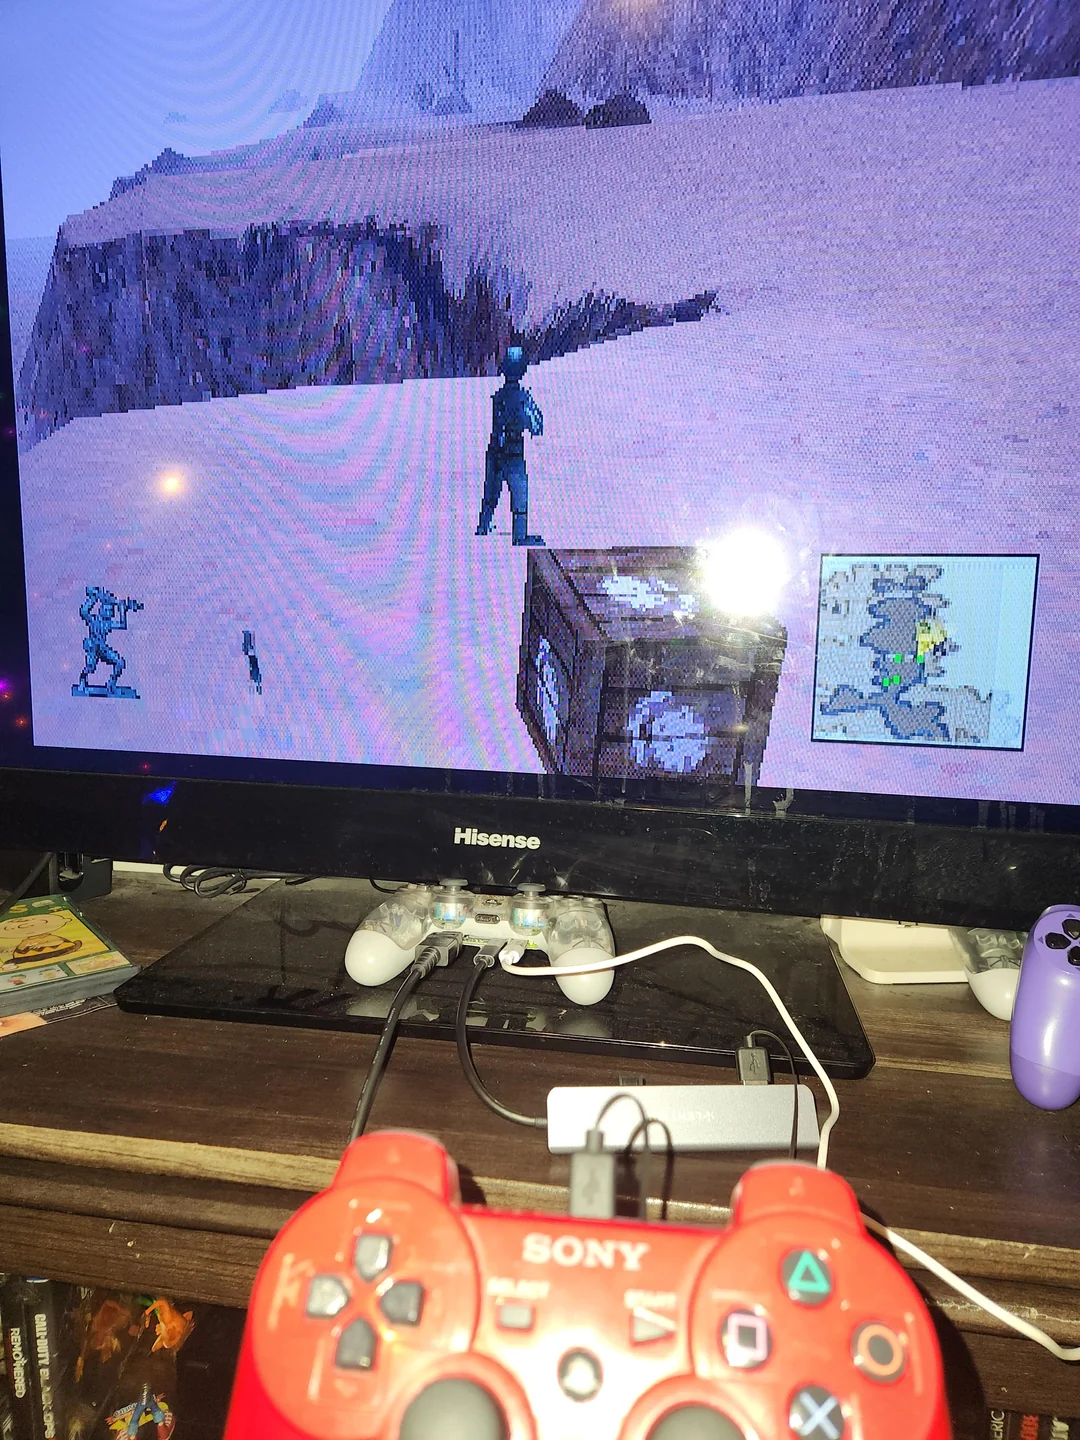
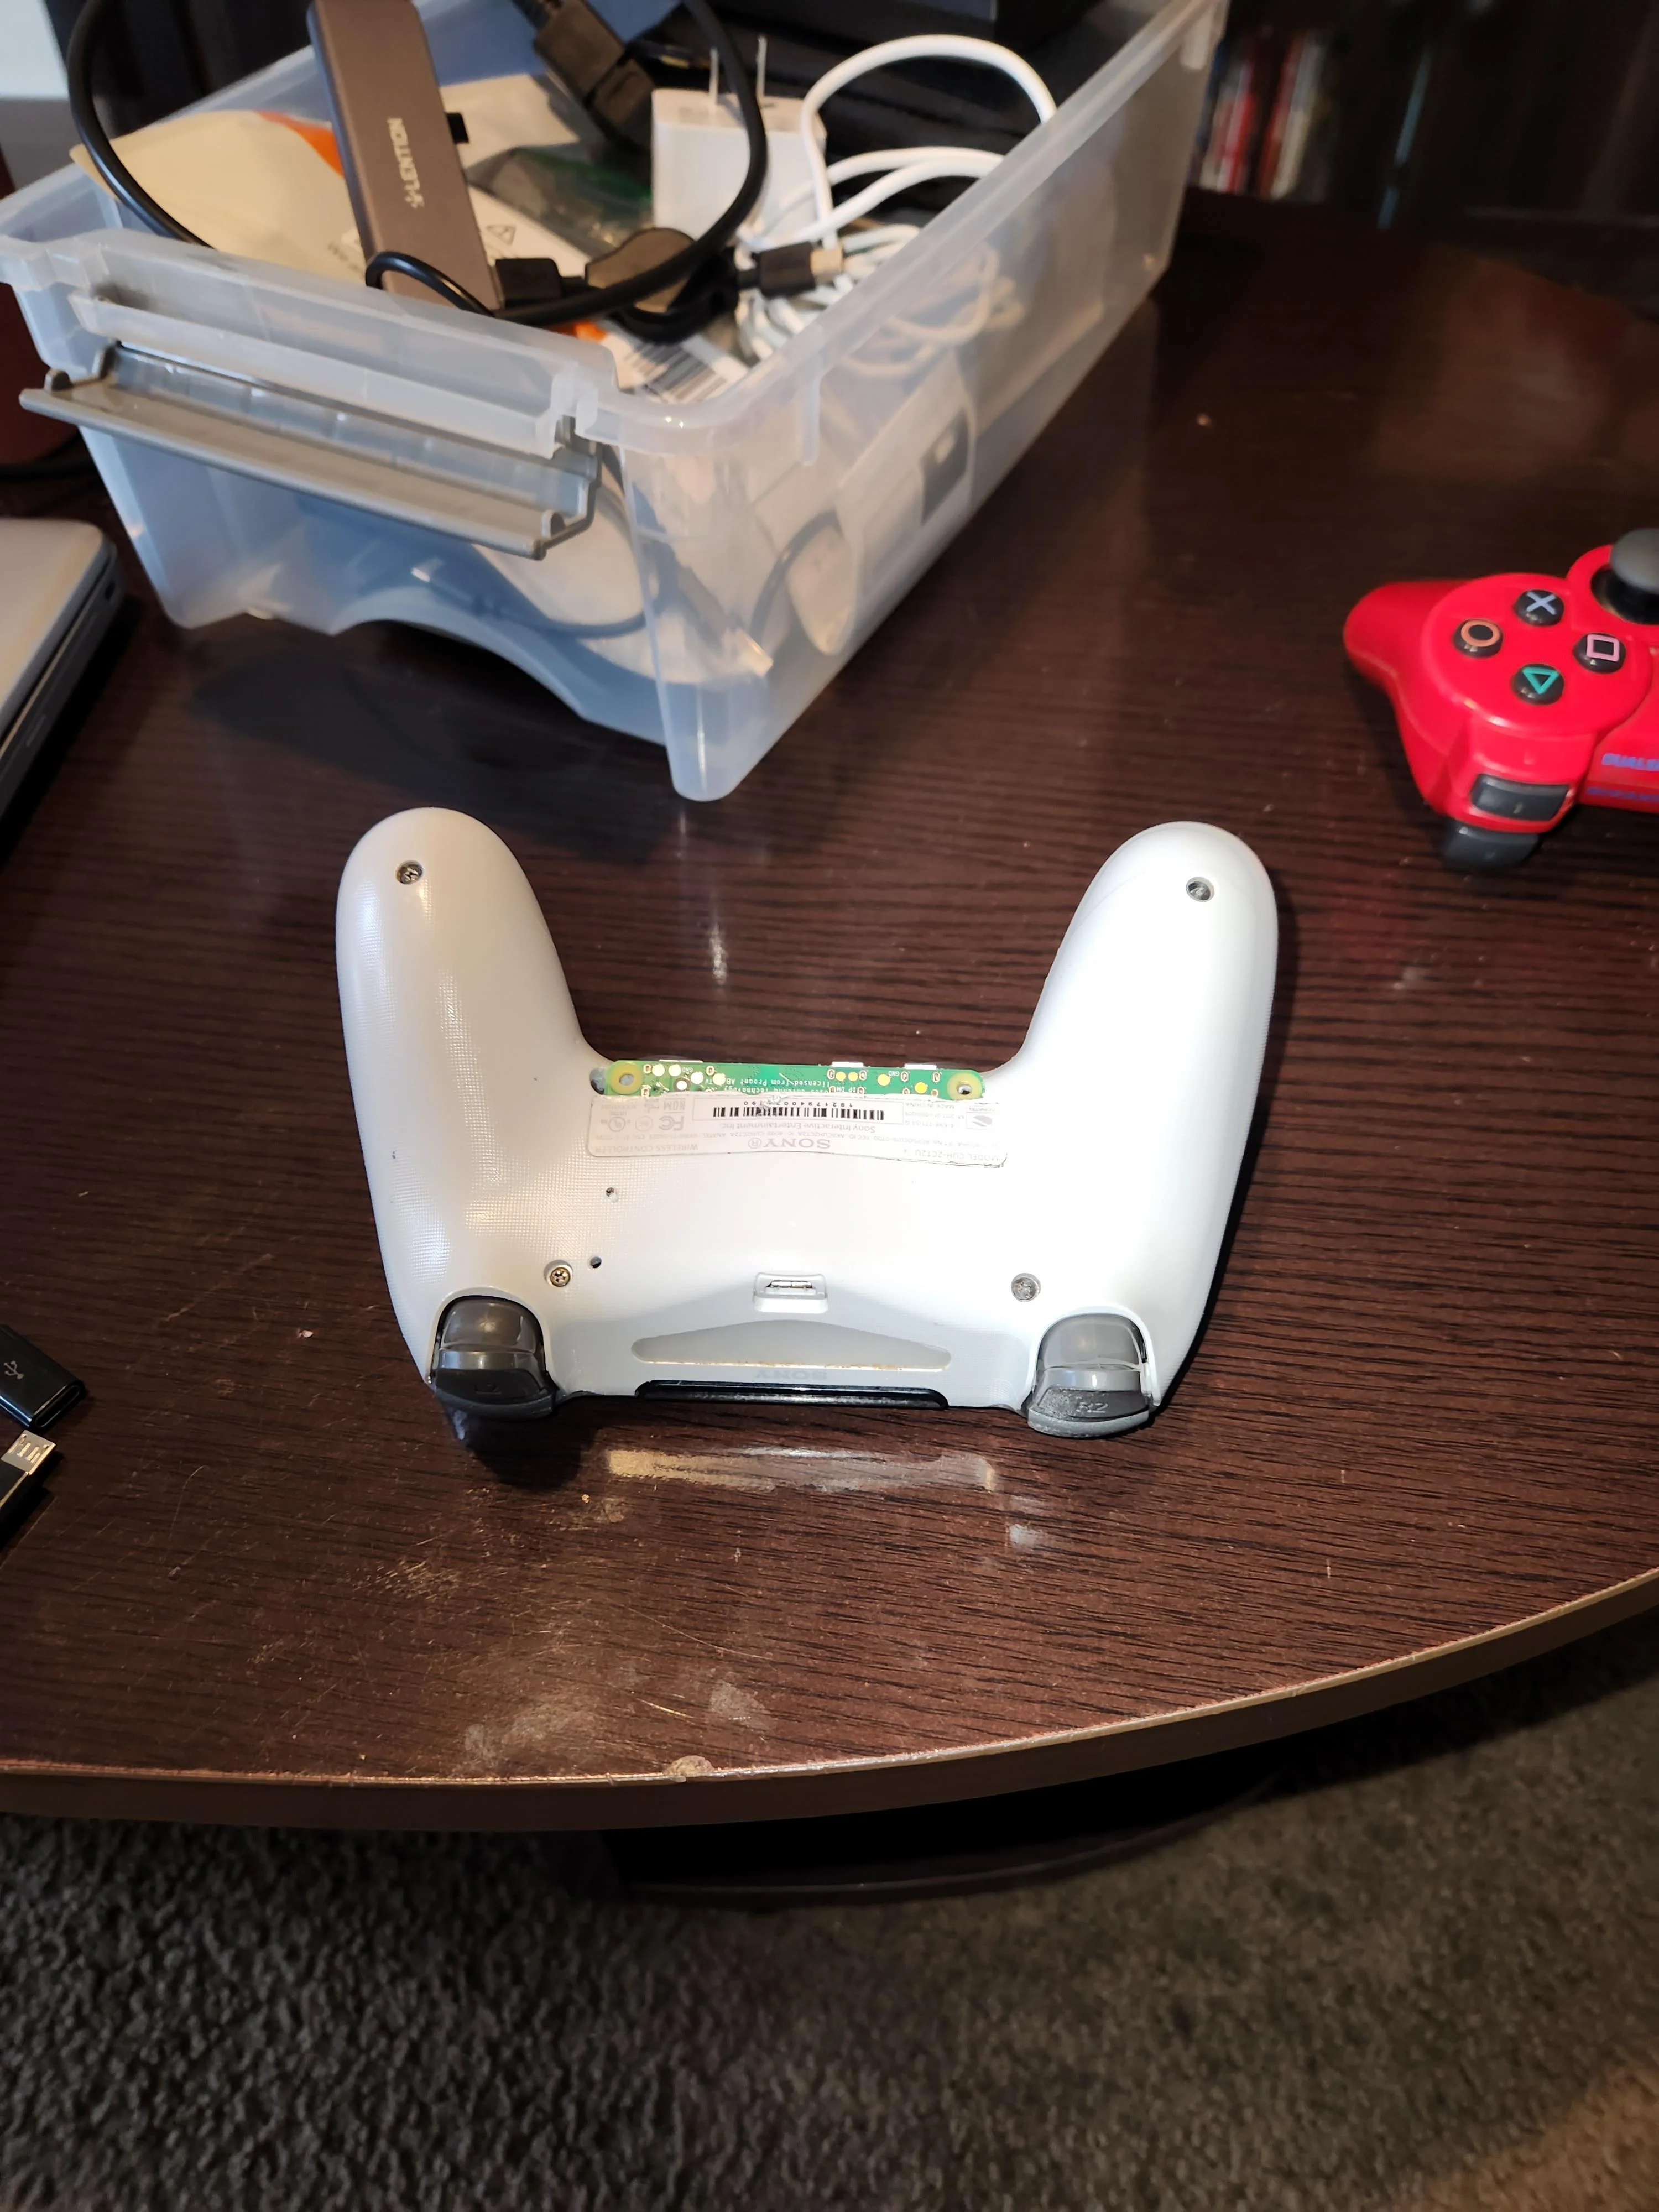
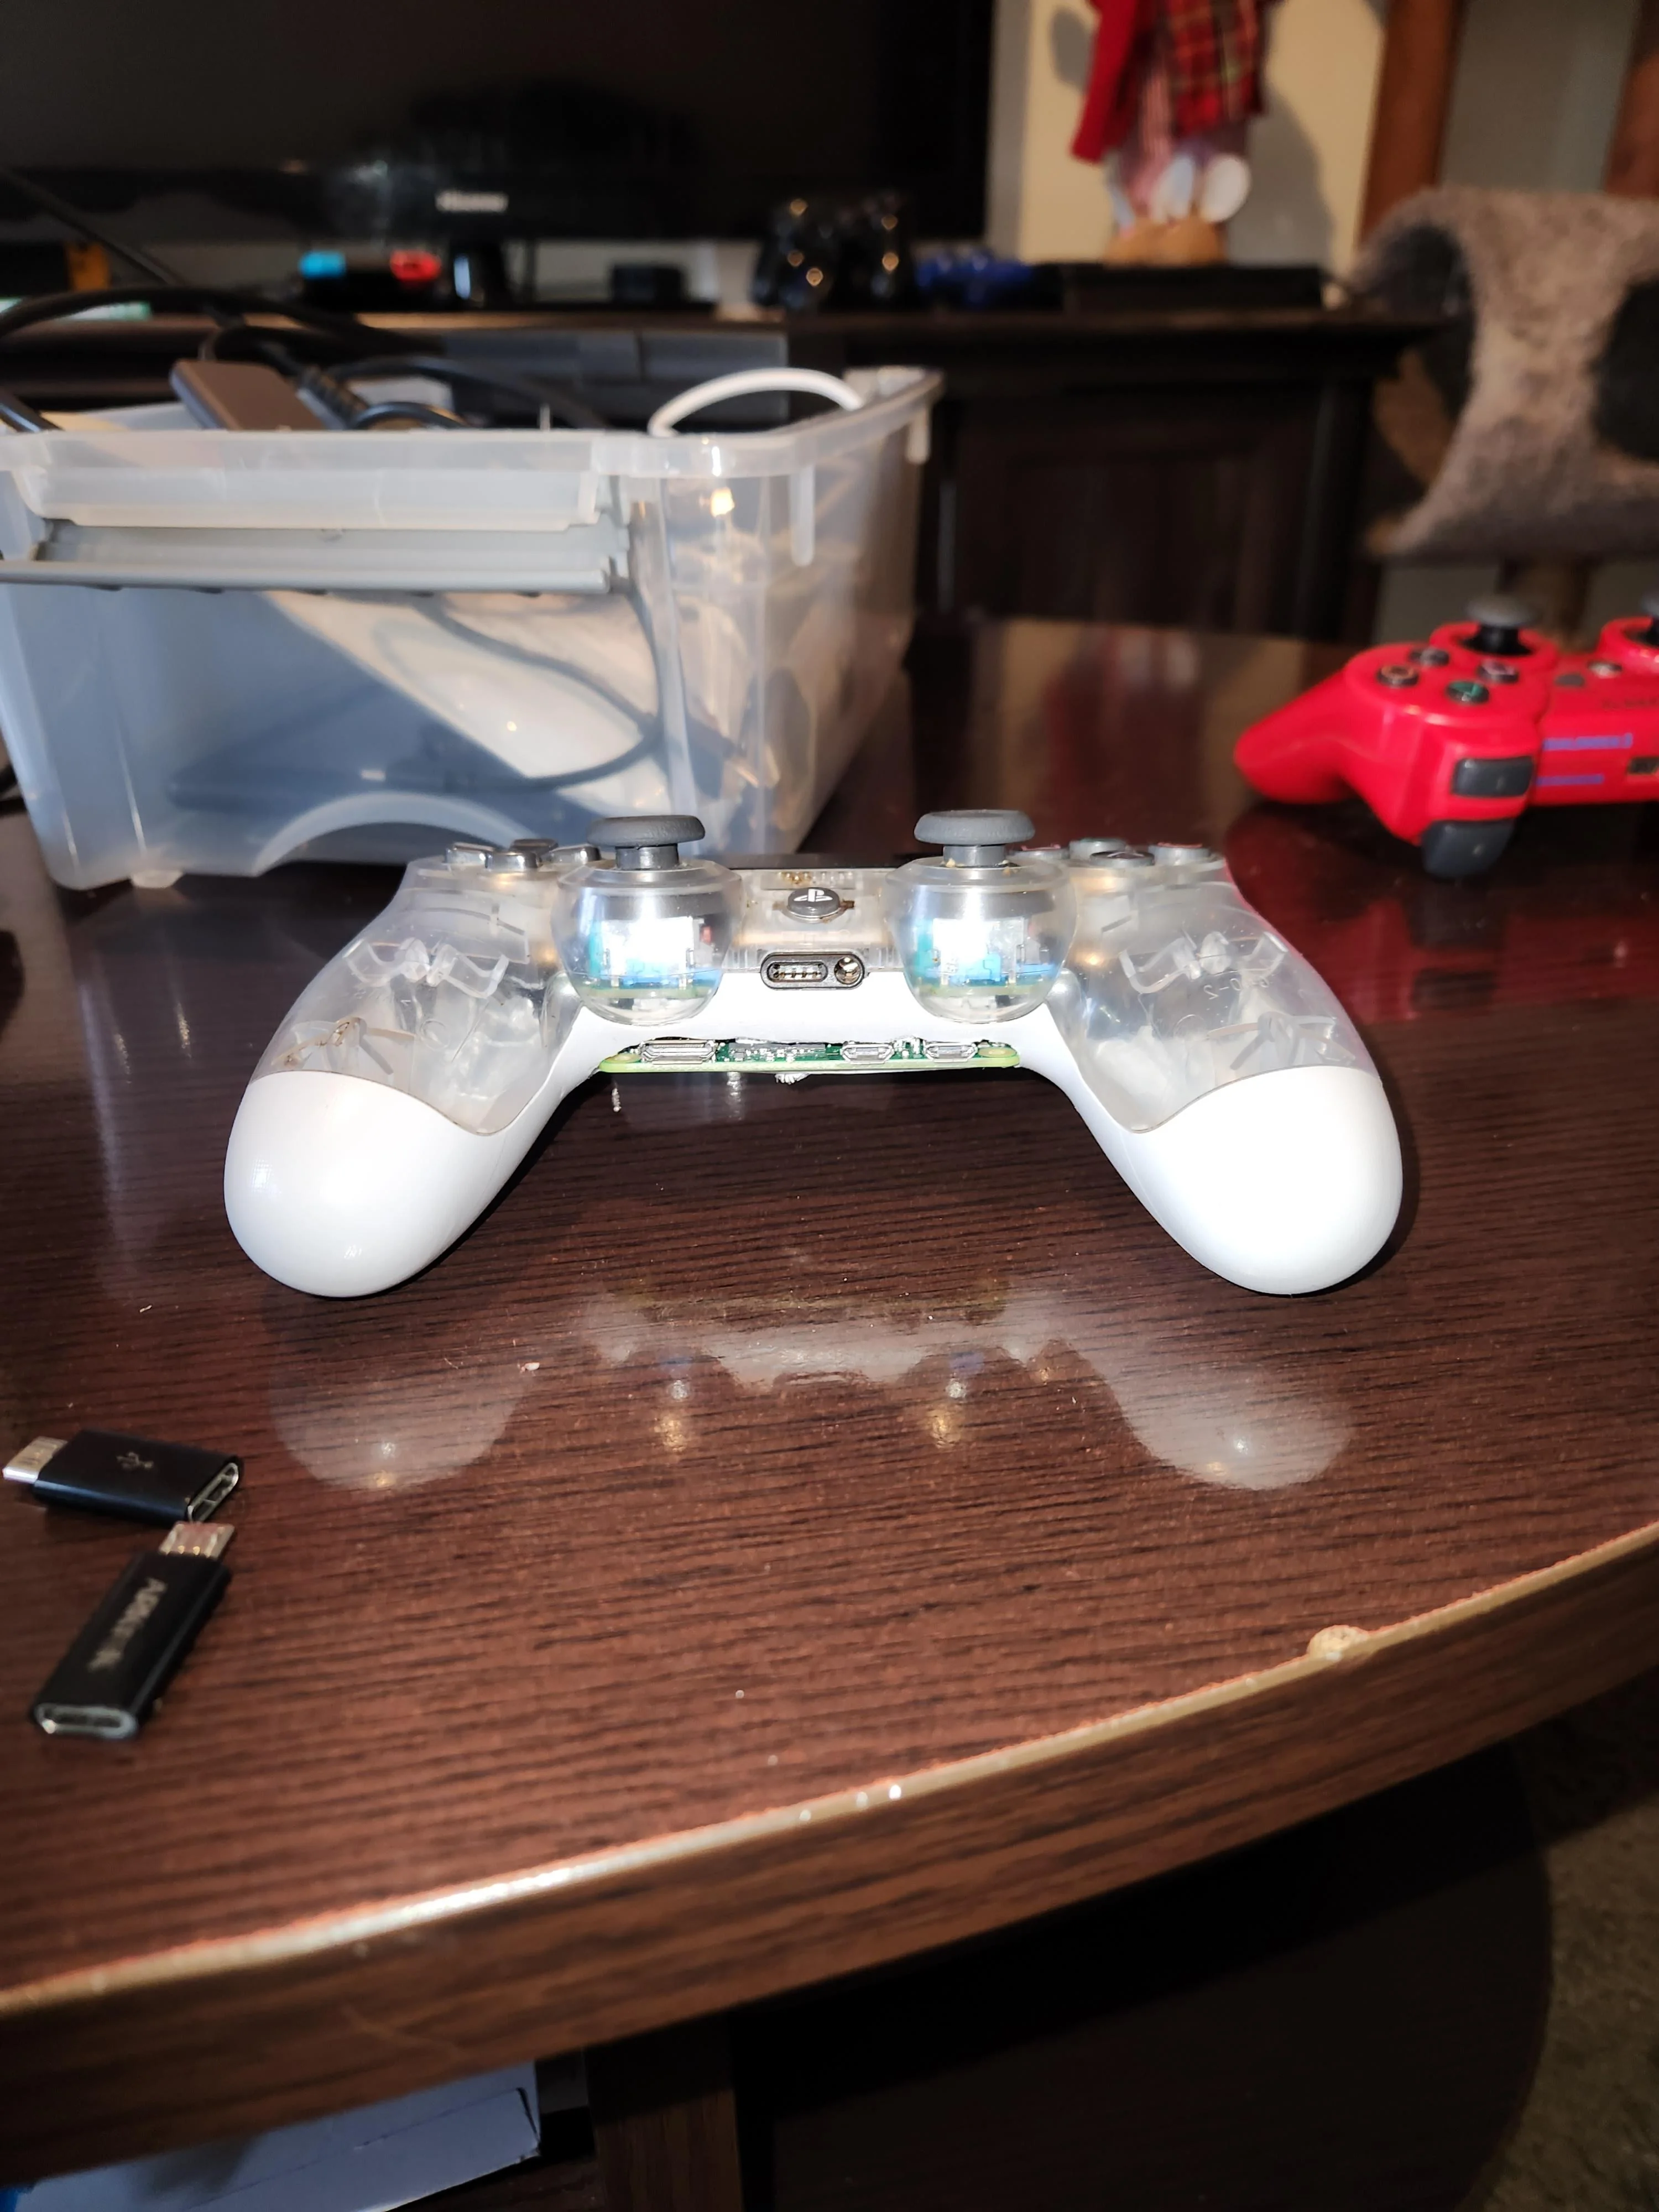
ConsciousFish6170: Idk why my description didn't post. I put a raspberry pi 2 w inside a mostly gutted ps4 controller that wasn't working anymore. Wanted to make the controller still look functional so I left the joy sticks but removed what I could to fit the pi. I have retro pi on it running nes, snes, ps1, gba, and n64 but n64 doesn't seem to run great. I have two usb c mini adapters for the power supply and a USB hub. I was able to upload roms on a micro SD and put that into the USB hub to put roms on. I have only ever seen USB sticks and tried the micro SD because it was all I had. This is my first attempt at using raspberry pi and any kind of emulators.
view more: next ›
I am looking forward to the new homestead. Also the new elite specs look interesting, can't wait until we hear more.