1
52

Got this pamphlet for a 3d printer and they're boasting "proprietary software!" on the flyer like it's a pro and not a con

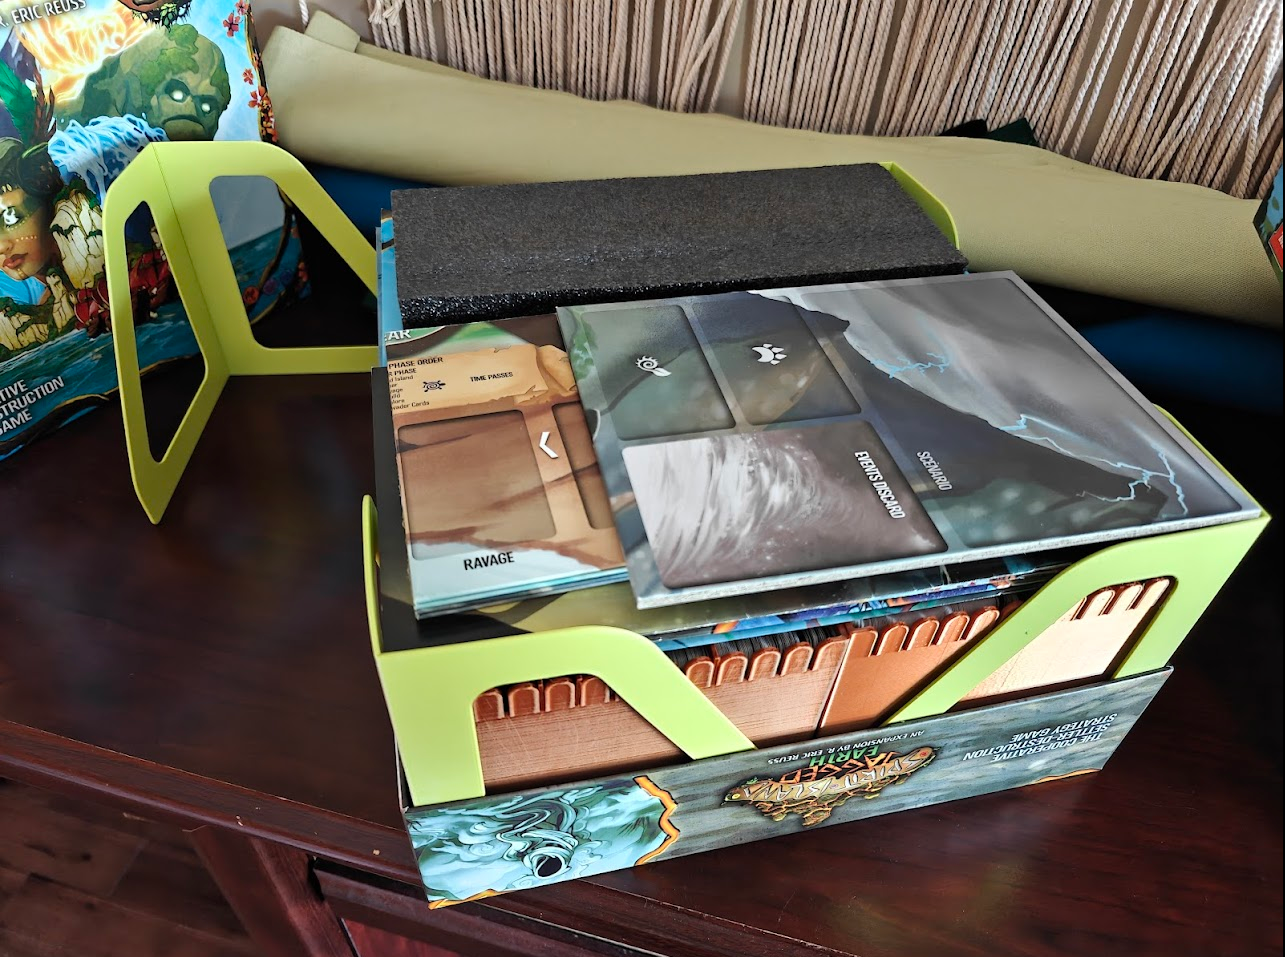
I've been experimenting with foldable 3d prints for tall thin walls in some game organizers. (Bigger pictures below.) The principle here is sort of similar to a living hinge, but not designed to flex too many times. Just fold once and be a reasonably stable structure.
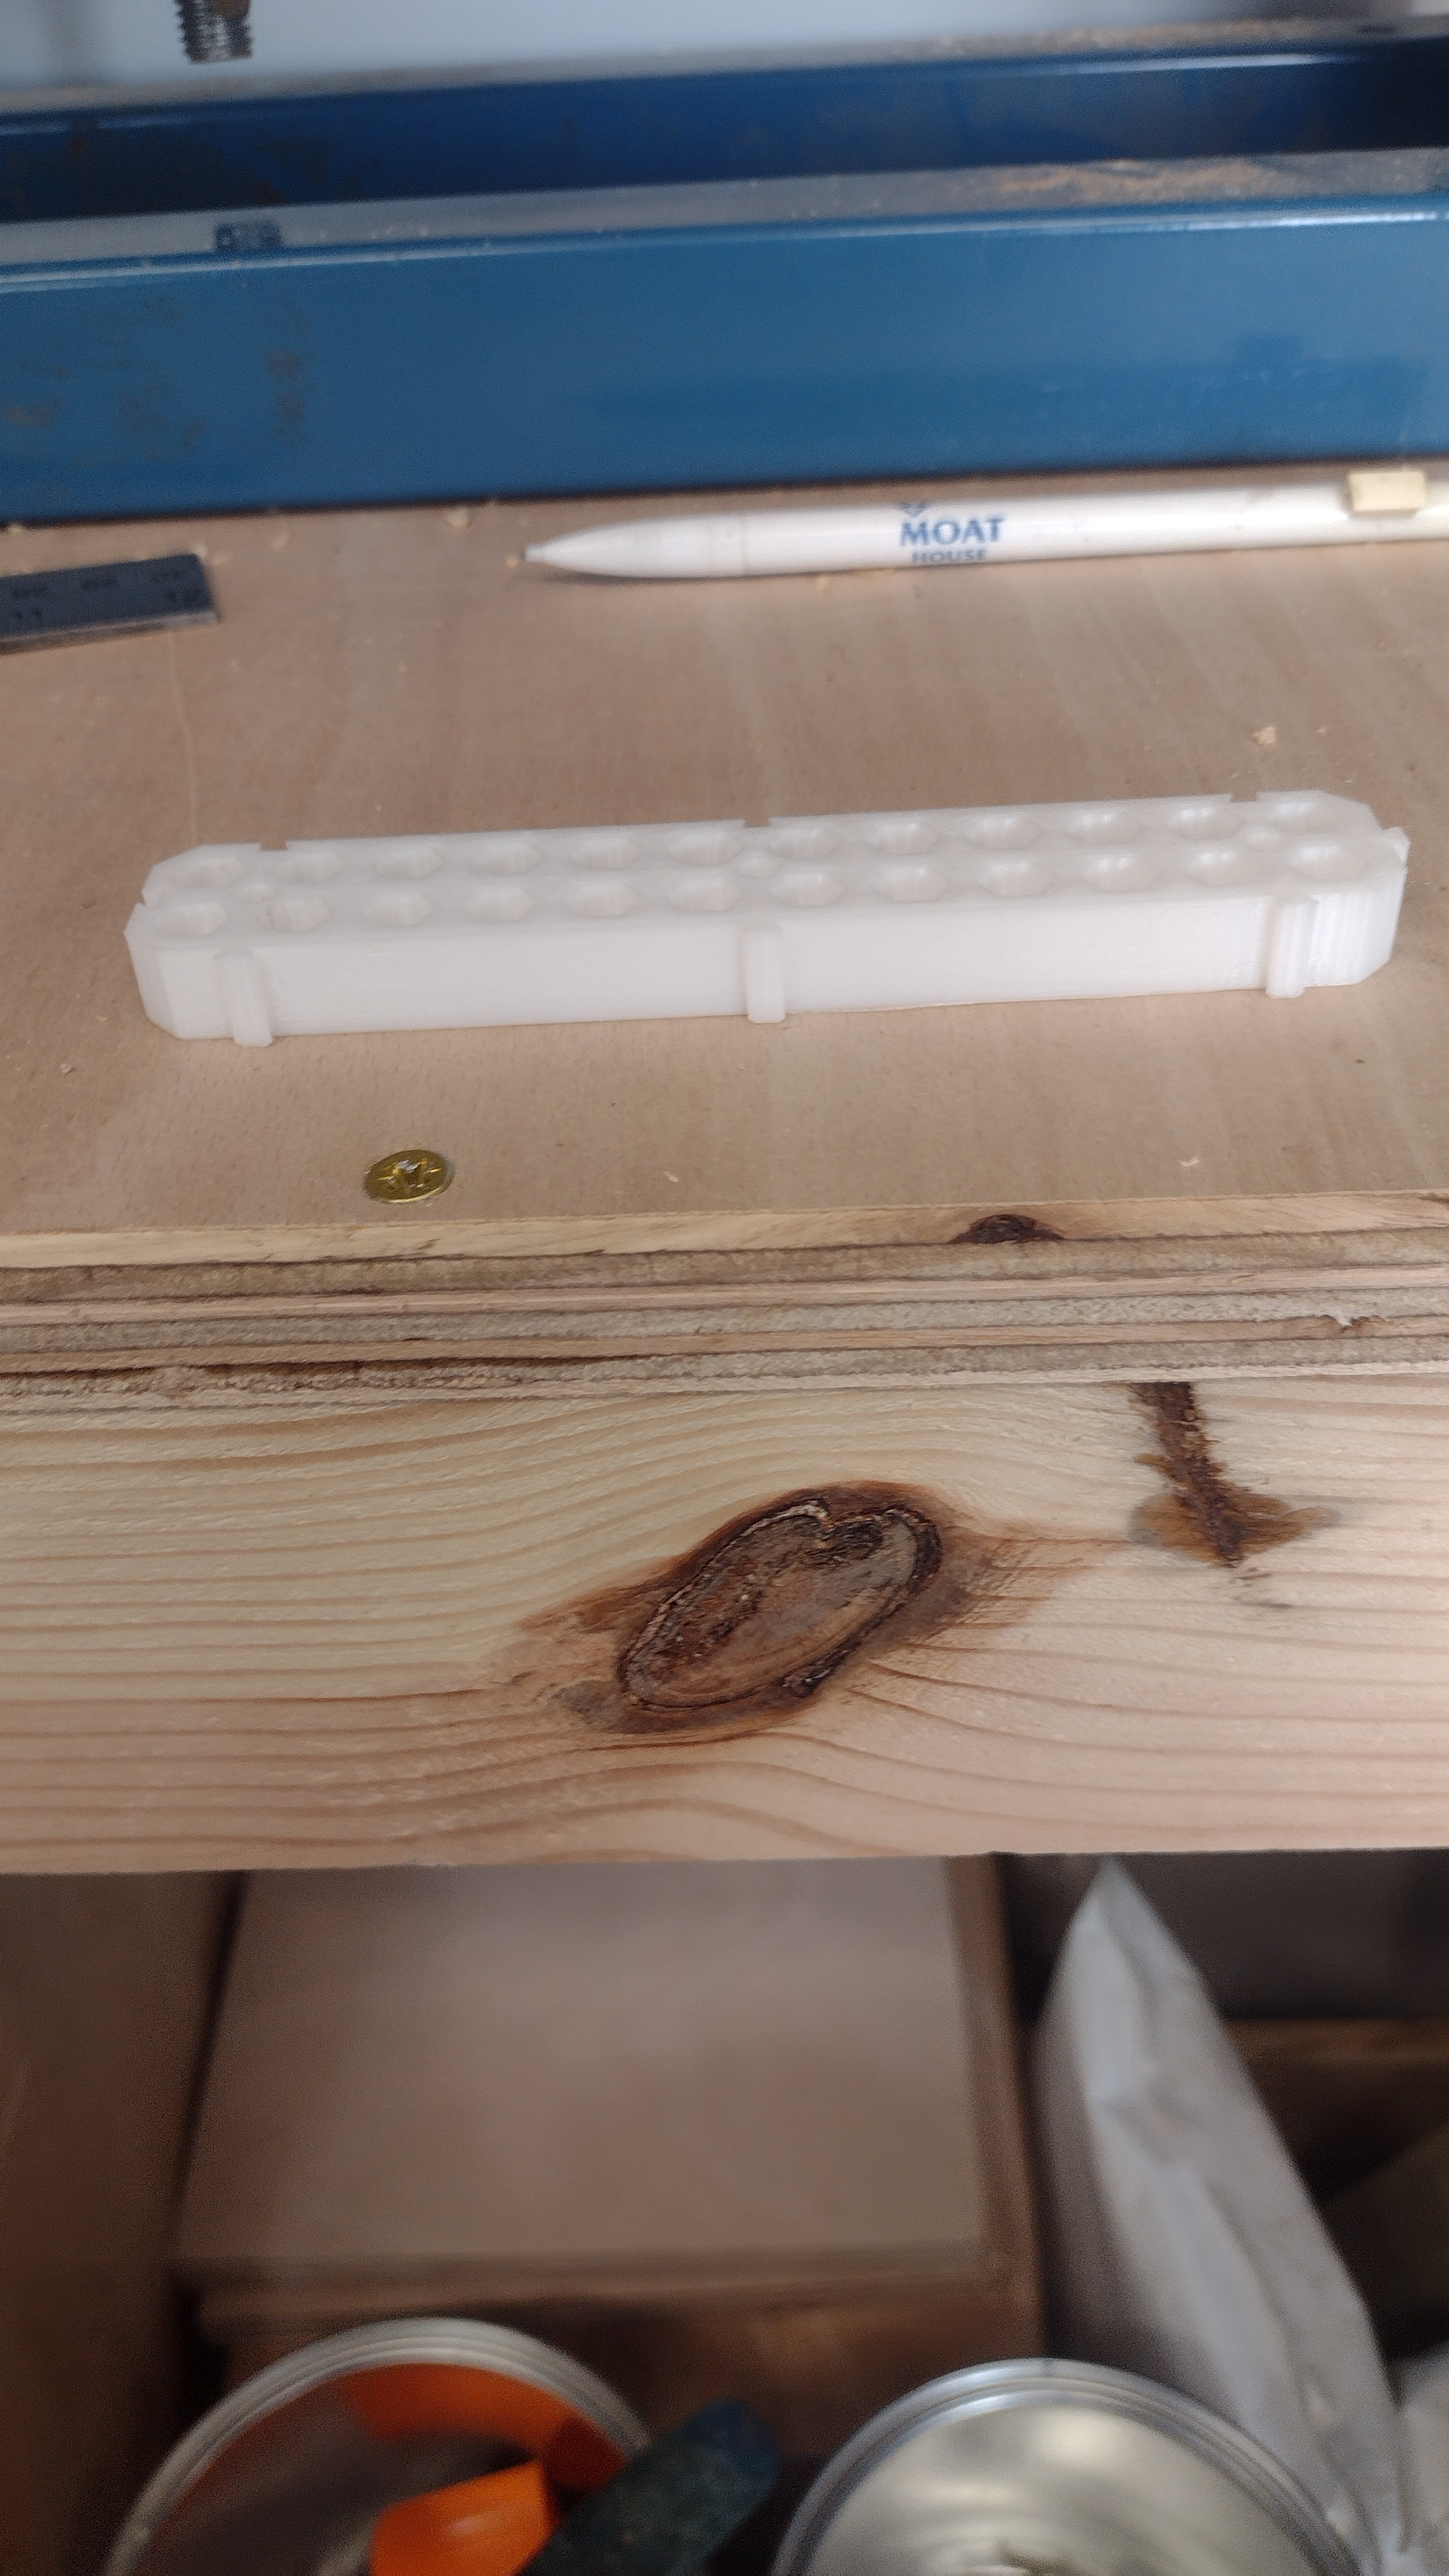
Here are some individual pictures of the designs I've made, for corner support of some game organizers. Below, I have explanation and the design/dimensions that I use.


Overview
I haven't seen this type of design too often before, so I thought I would share what design and dimensions worked for me. Here is an overview:
I design what I call the Wall as an outline, with some cutouts to reduce material. This is the part that prints flat and will fold up.
I apply a chamfer to all edges, to help with removal from the build plate.
I make a Y-Profile for the fold line grooves. The profile is vaguely Y-shaped, with a short rectangular base and an angled top. (Picture below; the Y-profile is labeled "cut out groove" there.)
I use the Y-profile to cut away material from the wall to make those grooves.
I print these in PLA (the pictures are matte PLA, because that's what I had). I guess PETG might be more sturdy, but honestly the PLA was so good that I haven't bothered with PETG.
Here is a picture, which I'll explain below.

Design Details
The top of this picture is an edge-on view of the wall (green horizontal lines) and the Y-shaped profile (labeled "cut out groove"). I use the following dimensions:
That last measurement, the width of the Y-profile base, is what the bottom part of the picture is about. The key idea is that width is going to be, roughly, 1/4 the circumference of a circle with radius a. So, I computed that amount, and multiplied by 1.1 to give 10% extra width.
With these dimensions, the part that folds is 0.4mm thick (dimension b in the pictures), then there is a 0.3mm clearance (dimension a), and the two arms of the "Y" fold together. In my first trials I used 45 degrees for the Y arms, but found that I got a better fold making them a little wider (so, lowering the angle from horizontal, to 40 degrees). This basically gives a little extra tolerance for variations in the physical print.
Conclusion
I hope this helps someone! I think it's a neat technique, and I'm a little surprised that I haven't seen it used anywhere else. I've seen various designs for living hinges, which are roughly the same principle, but designed to flex repeatedly. Searching around, I found one foldable cube on thingiverse. But otherwise I haven't found any models using this kind of design.

Much better! As you can see near perfect.
Before I go into any detail, let me please thank each and every person who commented on my last post. Reddit was my social media of choice way back when I first got this printer, and I recall having an issue then... And the advice on reddit was, nonexistent. within a few minutes of my post yesterday I had several thought out answers. And to my surprise, not one of them were simply "go buy x printer".
So once again thank you for being such a good community!
Now regarding the print.... The bed was cleaned with 99% IPA, I hadn't realized just how superficial a lot of the marks on the print bed were! Came up a treat with alcohol!
I modelled a print to basically stretch across almost the entire width of the print bed, so that I could do a few iterative tests quickly. Simply cleaning the bed definitely increase the adhesion.
Next I bumped up the temperature of both the print head and bed. 220, and 85 dropping to 75 after 10 or so layers. Now this seemed a fraction higher than I would be happy with, but you can't argue with results? And I did use a few different methods to double check the temperatures involved and they were relatively close.
More is a proof of concept at this point, i made a relatively dilute PVA solution and wiped it across the surface... Definitely overkill but by this point the print was adhering perfectly.
But I'd like to share with everyone here, a revelation. Using only cutting edge techniques, that is, my eyes.... I read the label on the side of the spool which quite clearly said PETG. Which might explain a little bit of my difficulty 😂
Thanks again to everyone in the community.
I'm trying to get back into 3d pruning after a long hiatus.
I found my old Anycubic Chiron, and thought I'd give it a go. Smaller prints seem fine. But anything longer than an hour. Come off like this. I say that what I mean is I excitedly take the multi hour print off the bed in excitement and for get to look at how it is.
The two longer prints definitely were at least in part still adhered to the print bed despite it being cold.
My next plan is to set a print away and check on it every hour or so and see if one side of the print has warped mid print (so far I've been printing before I go to bed, and only watching the initial couple of layers).
My guess it that the (pla+) filament is warping mid print... Its old I'll admit. But was stored in an airtight container with silica packs, and I dried it out before using. But any of your thoughts would be greatly appreciated!

I wanted to share this highly customized GameCube keyboard controller I built for use with Animal Crossing. Since the first AC game doesn't support keyboard input, I used a Pi Pico to listen for keypresses and send simulated analog stick movements to the game, automating typing in Animal Crossing at a tool-assisted speedrun level. It works a treat! I designed the keycaps in FreeCAD and printed them on a Bambu P1P with an AMS and two different colors of PLA. The code and design files are available for free on GitHub.
And a full build/demonstration video is available here (I ended up making it do a lot more than just typing) - https://www.youtube.com/watch?v=Yw8Alf_lolA

I’m hoping you guys can help me figure this out. I have an ender 3 pro, running on marlin firmware.
Every time I try to print something one of the corners will lift up like that and ruin the entire print. I installed a crtouch to help with leveling, installed upgraded metal bed wheels to help it not fall out of level. Even tried a glass bed with glue and it still does the same thing. I used a filament dryer and have a heat enclosure.
I’m starting to run out of ideas on how to fix this. Any suggestions? The pic is how it starts and that was just a brim since I used to always use a raft and thought I should try that instead.
Got myself a PolyDryer and was very confused why it included bowden tubes. But then I had an idea. Why not just include a mount for the tubes on my setup and use it to guide my filament into the printer. Love how well it turned out.
https://www.printables.com/model/1354587-slim-filament-guide-for-prusa-mk4

I was printing some ABS on my modified Anycubic I3 Mega overnight, when I awoke to this horror of a destroyed glass print bed...
Now the question remains, how to actually fix this? One part is still firmly attached to the Bed and I fear this may destroy the Bed even more.
And I obviously need a new Print bed, but I can't find the exact replacement, so should I even get a replacement Ultrabase? I saw that there are magnetic PEI beds available, but I am unsure if it is worth the 80-100€ for this.
Edit: Since the glass is glued to the 1.5mm aluminium heater PCB (and I already had to resolder the broken off wires once) I was looking at complete replacements at first, which why the price is relatively high

First PETG 3d print in a while. Main body seems fine but overhangs are not. Unsure why. Need to investigate. (it's a phone stand, the central portion swings out and makes a triangle, holding phone in that curve.)
Stl https://www.printables.com/model/979455-collapsible-stand-for-phone-or-tablet

3DPrinting is a place where makers of all skill levels and walks of life can learn about and discuss 3D printing and development of 3D printed parts and devices.
The r/functionalprint community is now located at: or [email protected]
There are CAD communities available at: [email protected] or [email protected]
No bigotry - including racism, sexism, ableism, homophobia, transphobia, or xenophobia. Code of Conduct.
Be respectful, especially when disagreeing. Everyone should feel welcome here.
No porn (NSFW prints are acceptable but must be marked NSFW)
No Ads / Spamming / Guerrilla Marketing
Do not create links to reddit
If you see an issue please flag it
No guns
No injury gore posts
If you need an easy way to host pictures, https://catbox.moe/ may be an option. Be ethical about what you post and donate if you are able or use this a lot. It is just an individual hosting content, not a company. The image embedding syntax for Lemmy is 
Moderation policy: Light, mostly invisible