I Made This

3374 readers
1 users here now

Did you make something? Do you want the fleeting rush of endorphins that come with affirmation from strangers? Do you think what you made is neat? Share it here!

Paintings, movies, music, drawings, models, gardens, houses, snowmen, sandcastles - if you made it, you can post it.

RULES:

Some things you make are not to be shared. These include:

Do not be a jerk.

- No racism, sexism, homophobia, transphobia, ableism, classism, or bigotry of any kind.

- Don't try to sell stuff unless people ask. You can post your Etsy (or similar) if someone prompts you. No spamming self-promotion.

<3

founded 2 years ago
MODERATORS
26


Plug one side of the cable on the left of the box, the other side on the right, press the button and whichever light doesn't come on means that part of the cable is faulty. I learned a lot from my bad decisions :)

27


cross-posted from: https://lemm.ee/post/54114046

๐Ÿšซ No AI is used in my process. Progress pictures and more are here!

Drew some sheargrubs and shearwigs from Pikmin! I hope you all enjoy! ๐Ÿ˜ƒ

28


Tomorrow at work we have an event where everyone will bring a little thing and randomly give it away to someone else. I wanted to make something with wood and ended up with this little mushroom island.

29
23
Carbs scoop (lemmynsfw.com)
submitted 2 months ago* (last edited 2 months ago) by [email protected] to c/[email protected]


I made this a few years ago and still use it regularly! The "spoon" side fills up with 1 portion of rice and the hole in the handle can fit 1 portion of spaghetti. What do you think?

Edit: sorry about the double post.. I thought I had backed out and lost the first one so I posted this one, and I just noticed the first one went up

30


Made this out of a plastic bottle after seeing a YouTube video (can't give credit unfortunately as I can't find it anymore).

You can make it into any shape that the bottle will fit around (and can't be much smaller than the bottle since it will only shrink so much).

I used a piece of wood as template, cut the top of the bottle, put it around the piece of wood and shrank it with a heat gun. I then cut off the excess and shaped the closing mechanism.

It took a few tries to get it right but I've since used the technique to make containers/protections for several objects and I'm very happy with the results!

If you want to try this, be aware that the tightest you shrink the bottle around the template, the hardest it will be getting it out! I suggest making the template in atleast 2 pieces, this helped me a lot. (In this example I first pulled out the small wooden tab with pliers, and once out the bigger one came out easily).

31


gluing the handle with clamps

blade before drilling holes and hardening

stretching steel

32


Had nearly all the parts lying around, so I put this thing together.

I wanted to add stereo speakers, but it's hard to find good wiring diagrams for such a niche thing. So, mono for now.

The motherboard has a bad cartridge slot. So I designed and printed a custom speaker holder that fits into the cartridge slot. All pressure fitted, no glue.

Everything works so far. Just waiting for a new shoulder button/SD slot cable, so I can finish it up and load up some GBA games. :)

33


And pliers and Dremel tool of course, but yeah this safety guard mod totally keeps you from cutting your nails too deep!

Edit: You'll probably need to zoom in on the lower clipper blade to see the guard addition.

34


That was fast

35
36
172
submitted 3 months ago* (last edited 3 months ago) by [email protected] to c/[email protected]


I produced this video for The Gravel Institute a few years back before the organization folded.

It's popped off again recently for some reason. Maybe because everything has gotten worse?

37
38
39
442
submitted 3 months ago* (last edited 3 months ago) by [email protected] to c/[email protected]


I saw these dress form Christmas Trees for sale and thought it could be improved. I've been making costumes for 13 years and wanted to give myself a challenge. Except for the wig, every piece was handmade.

-I cut up an old skirt to make the corset and used the biggest zip ties as boning

  • Tore apart wreaths for greenery, pinecone, and silver pieces

  • Cut up a hoop skirt and designed a chicken wire underskirt for support

  • Used scrap leather for the harness

  • Hand sewed 160 keychain rings onto the green high-low skirt I made, so branches could be attached

  • Got a bunch of garland from a craft store and had a friend wire cut them into different sizes, to shove into the keychain rings and make it look like a Christmas tree

  • Sewed the collar

  • Modded fake white Poinsettia flowers so they could be attached to the corset, headpiece, and skirt

  • Used a wire, fake cardinal, and pieces ripped from the wreaths to make the Headpiece

I'm so proud and so happy! It was the most time consuming, expensive, and complex costume I've ever made and it's the cleanest and most gorgeous thing I could have imagined!

Though I have no idea where to store it (it's been my literal Christmas tree this season) and the skirt alone weighs about 35lbs. ๐Ÿ˜…

40
41


(Does this community allow posts about product restorations? I didn't forge these skillets, but I did make them usable and appealing again.)

cross-posted from: https://sh.itjust.works/post/30170080

(long time lurker, first time poster)

A few months ago, a friend convinced me on the benefits of cast iron skillets. Having only used Teflon-coated non-stick pans, I figured it would be worth a try, if I could find one at the thrift store. Sure, I could have just bought a new Lodge skillet, but that's too easy lol.

So a few weeks pass and I eventually find these two specimens at my local thrift store, for $5 and $8 respectively. It's not entirely clear to me why the smaller skillet cost more, but it was below $10 so I didn't complain too loudly. My cursory web searches at the store suggested that old Wagner skillets are of reasonable quality, so I took the plunge. My assumption is that the unmarked, smaller skillet is also a Wagner product.

10-inch skillet ($5) 9-inch skillet ($8)
a crusty 10-inch cast iron skillet with "Wagner" vaguely visible in the inscription
a crusty 9-inch cast iron skillet; no brand name

It's very clear that both these skillets are very crusty. Initially, I tried to remove the buildup using a brass wire brush. This was only somewhat successful, so I switched to a stainless steel wire brush. That also didn't do much, except reveal some of the inscription on the bottom.

the 10-inch skillet after stripping with a wire brush, with "Wagner Ware Sidney" and "1058 1" visible in the inscription

Some research suggested I could either do an electrolysis tank, a lye bath, or try lye-based oven cleaner. For want of not over-complicating my first restoration attempt, I went with the oven cleaner method, using the instructions from this video: https://www.youtube.com/watch?v=2Pvf0m9jTeE

For both skillets, I had to apply the oven cleaner six times to finally shift all the crud, each time leaving the skillets in the garbage bag for a full day-and-a-half in the sun. In between applications, I would brush off more buildup, with the handle root and the skillet walls being the most stubborn areas. The whole process smelled terrible and hunching over the garage utility sink to brush pans is not my idea of a pleasant time.

Nevertheless, having stripped both pans, I proceeded with six rounds of seasoning with very old corn oil -- it's what was handy -- at 450 F (~230 C) using my toaster oven. This happened over six days, since I wanted to use my excess daytime solar power for this endeavor. I wiped on the oil using a single blue shop towel, to avoid the issues of lint or fraying with paper towel.

I don't have a post-seasoning photo for the larger skillet, but here's how the 9-inch skillet turned out. I think I did a decent job for a first attempt. And I'm thrilled that these are as non-stick as promised, with only minimal upkeep required after each use.

9-inch skillet, top side, with "7" inscribed on the handle

9-inch skillet, bottom side, reading "9 3/4 inch skillet"

42


My sister in law is very hard to shop for, but she knits and crochets. She also makes kimchi throughout the year, so I painted the ingredients for kimchi on some stitch markers she can use with her knitting projects.

43
128
Nessie Soup Pot Spoon (lemmynsfw.com)
submitted 4 months ago* (last edited 4 months ago) by [email protected] to c/[email protected]


The head is a spoon as well

44
45


Image Transcription

A small stack of Christmas cards, a small stack of envelopes with the back facing the camera, and a single envelope with the flap facing the camera.

The cards have a round grey cat holding a dead mouse with a red bow on the mouse in the cat's mouth. The cat is standing in front of a gold and dark green striped background. The words "Merry Christmas" are printed on the card in maroon cursive. There is a white border around the edge of the card.

The envelopes have parallel squiggly stripes diagonally covering the envelopes. The stripes are a repeating pattern of thick light green, medium thickness light yellow, thin light red, and medium thickness light yellow again. There is a path of paw-prints walking across the envelope in the same light green as the diagonal stripes.

The envelope with the flap facing the camera is printed with the same pattern and reveals the flap to be a flat-edge flap with rounded corners

I have wanted to send out Christmas cards to my friends for some time, but was never able to get a festive photo to use for such purpose; so this year instead of trying to convince my partner to take the appropriate pictures, I decided to illustrate the card instead.

As for the envelopes, I realized I did not have access to any A6 envelopes and it looked like it would take a long time for them to ship to me. Originally I was going to cut the envelopes out of standard construction paper, but I realized if I made flat-flap envelopes instead of triangular-flap envelopes, I would be able to cut the card out of a single 8.5"x11" sized sheet. With this in mind, I decided to design the envelope myself as well since I could print across the entire envelope area.

The pattern for the card was illustrated in Procreate (but the text was added via Illustrator). The envelope pattern was designed entirely in Illustrator (including the cutting template). The cards and envelopes were printed on card-stock and cut out using my vinyl cutter.

46


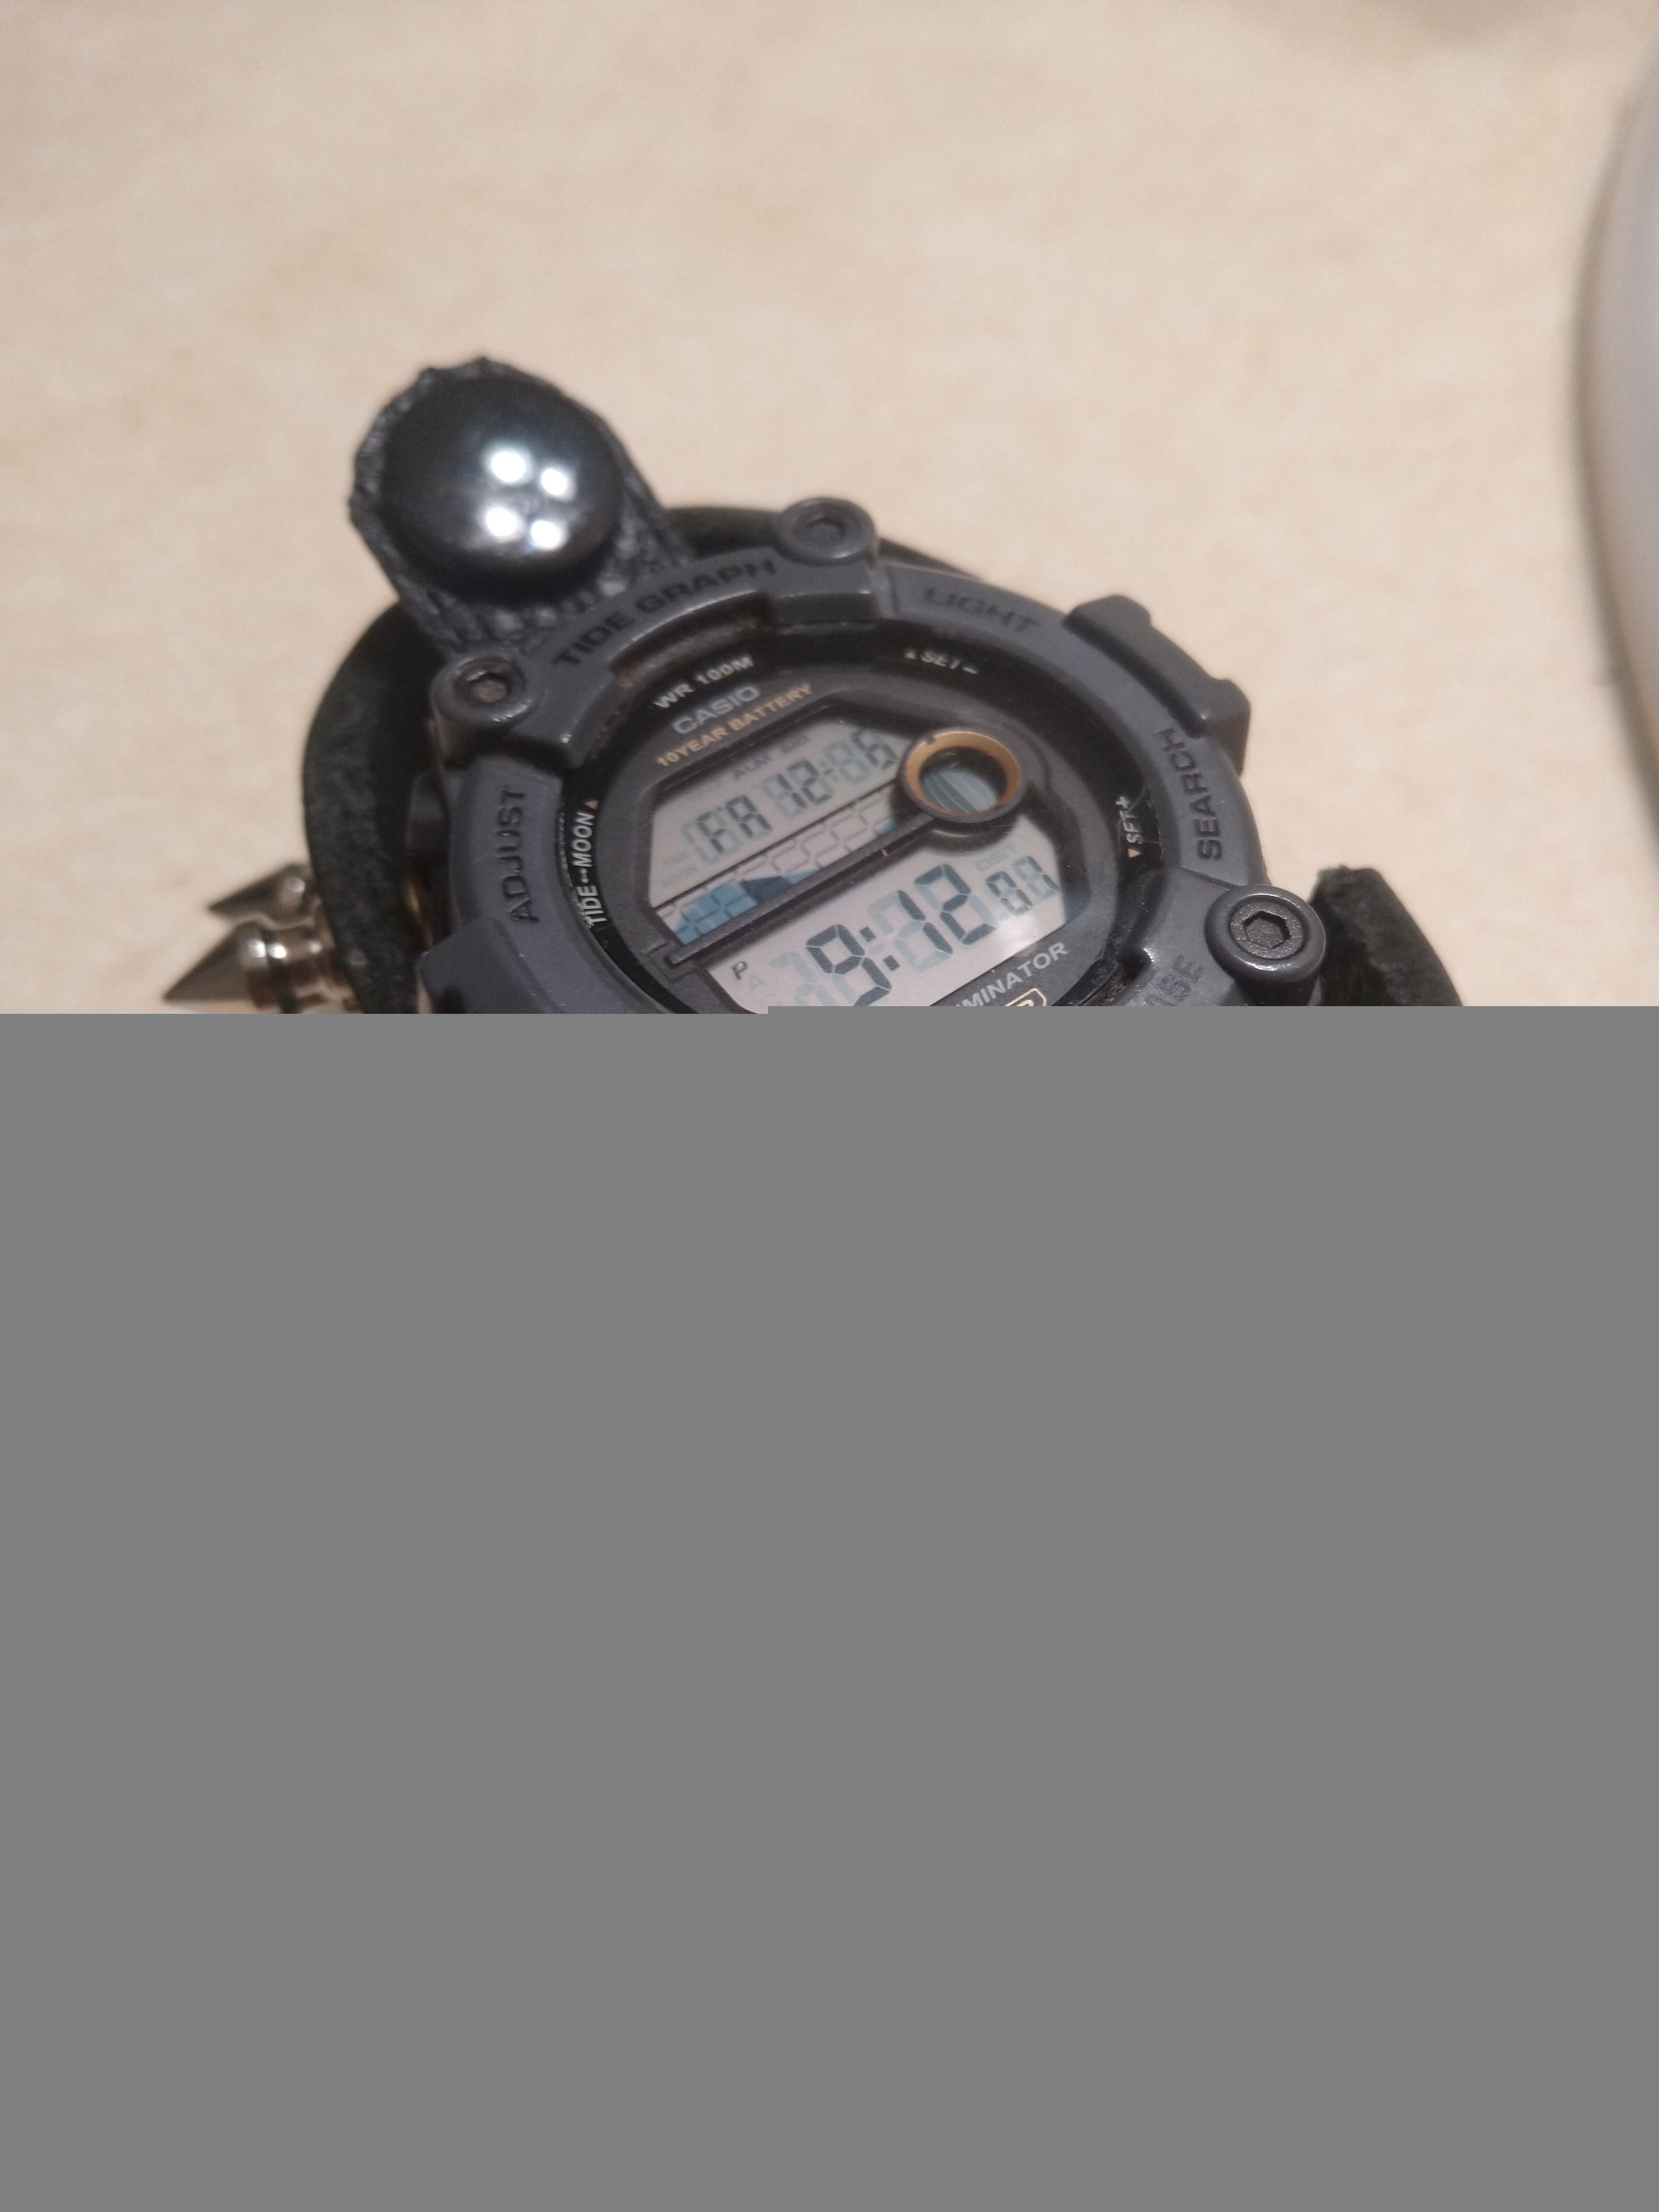
Obviously I didn't make the watch itself, but I have a different style to me, so of course I needed to make a custom band.

Don't ask how much it costed me, too much, but plenty of extra material.

47


Mod: Customizable Player Models Game: Minecraft

This new player model i made is more detailed and even has digitigrade legs and a tail with 4 segments (not visible in the screenshot)

48
 
 
49
 
 
50


Celebration card thingy I doodled up for another site. I really do enjoy drawing teeth and mouths way too much haha. Felt a little refreshing to draw in this lined style again since I love using different line thickness. I hope you all enjoy! ๐Ÿ˜ƒ

view more: โ€น prev next โ€บ